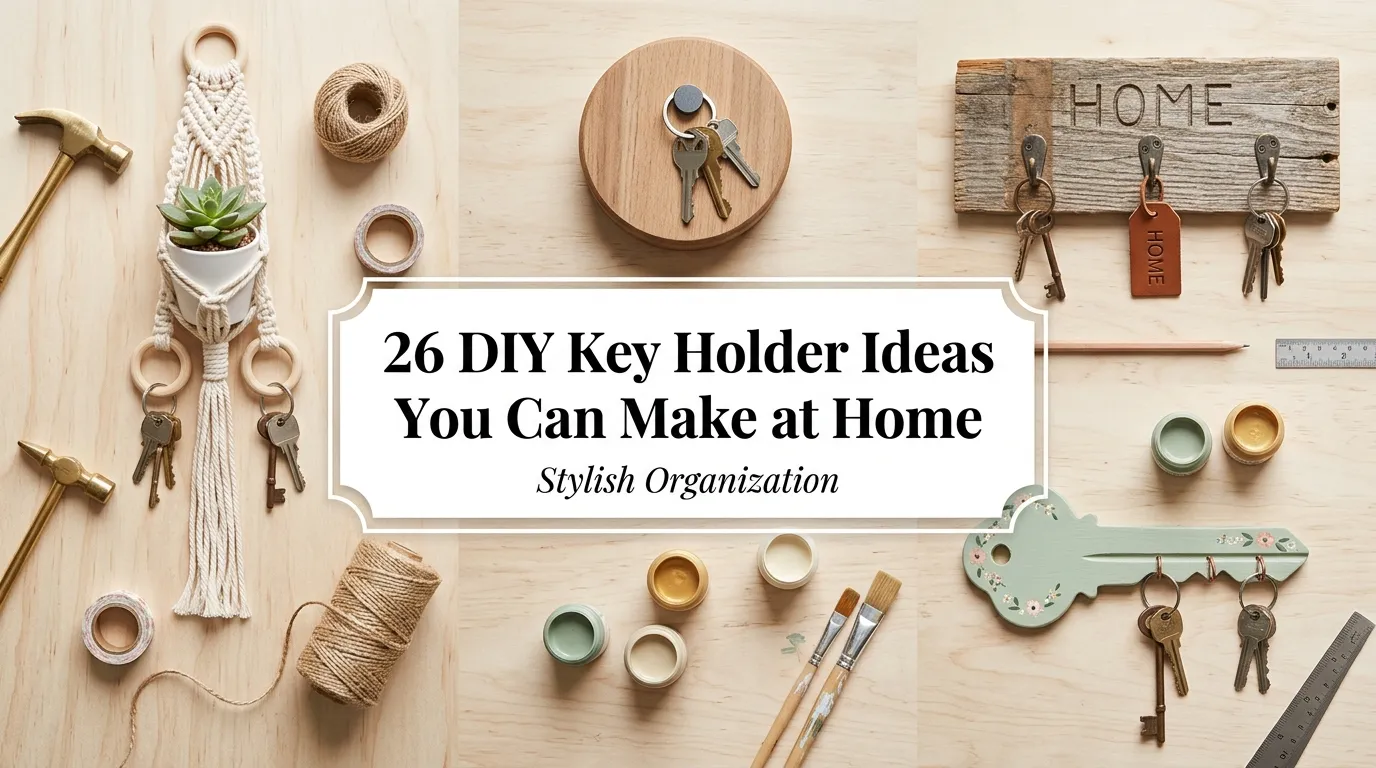
26 DIY Key Holder Ideas You Can Make at Home
Keys are small, DIY Key Holder Ideas but they can create a surprisingly annoying mess when they don’t have a dedicated place. A DIY key holder solves that everyday problem while giving you an opportunity to add personality to an entryway, kitchen wall, mudroom, or apartment.
The best DIY key holder ideas don’t need to be complicated. A reclaimed wood board, a few hooks, an unused frame, or even a small shelf can become useful storage with the right placement. Some projects are quick enough for an afternoon, while others can be customized with paint, stain, hardware, labels, or decorative details.
These 26 ideas range from simple renter-friendly organizers to more substantial entryway pieces, so you can choose a project based on your space, style, DIY Key Holder Ideas tools, and collection of keys.
1. Rustic Wooden Key Holder With Hooks DIY Key Holder Ideas
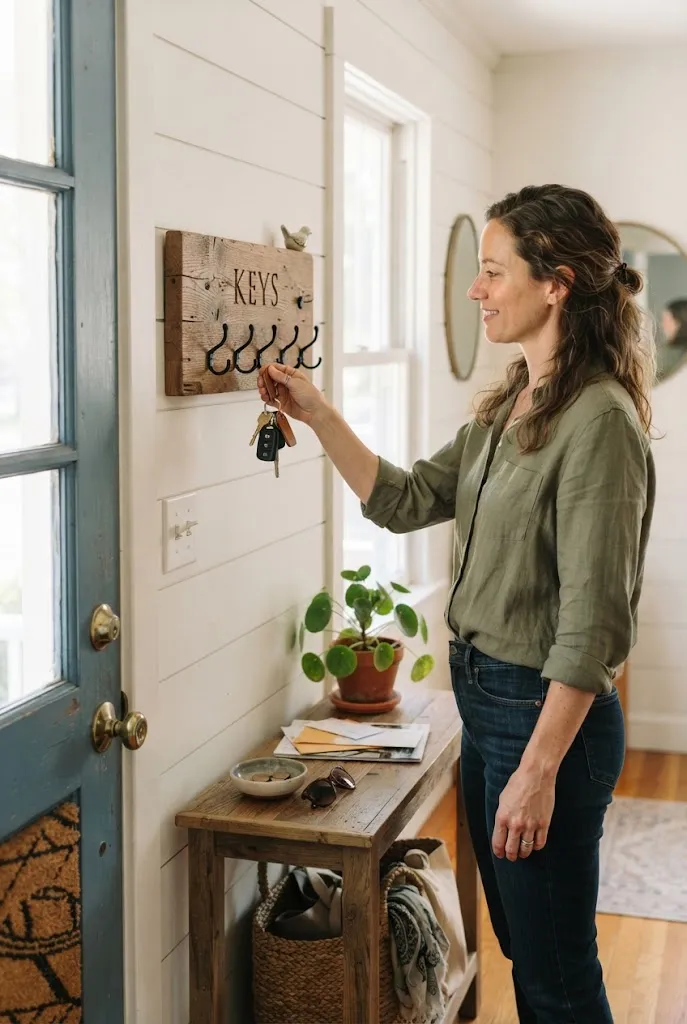
A simple wooden board fitted with several hooks is one of the easiest ways to create a useful key station. DIY Key Holder Ideas Choose a board with visible grain for a rustic appearance, or sand and paint it for a cleaner finish.
Materials & Tools
- 1 wooden board, approximately 16–24 inches long
- 4–6 wall hooks
- Screws suitable for the hooks
- Wall anchors appropriate for your wall
- Sandpaper
- Wood stain or paint
- Paintbrush or foam applicator
- Drill and screwdriver
- Measuring tape
- Pencil
- Level
Steps
- Measure and cut the board to your preferred length, or purchase a precut board.
- Sand the front, back, and edges until the surface is smooth.
- Apply stain or paint and allow it to dry completely according to the product directions.
- Mark evenly spaced positions for the hooks.
- Pre-drill holes if the wood is hard or likely to split.
- Attach the hooks securely to the board.
- Mark the mounting points on the wall and install appropriate anchors if needed. DIY Key Holder Ideas
- Mount the board and check that it sits level.
- Hang your everyday keys and leave enough space between key rings to prevent tangling.
For a farmhouse or rustic entryway, pair the board with black metal hooks and warm wood tones.
2. Minimalist Wall-Mounted Key Rail DIY Key Holder Ideas
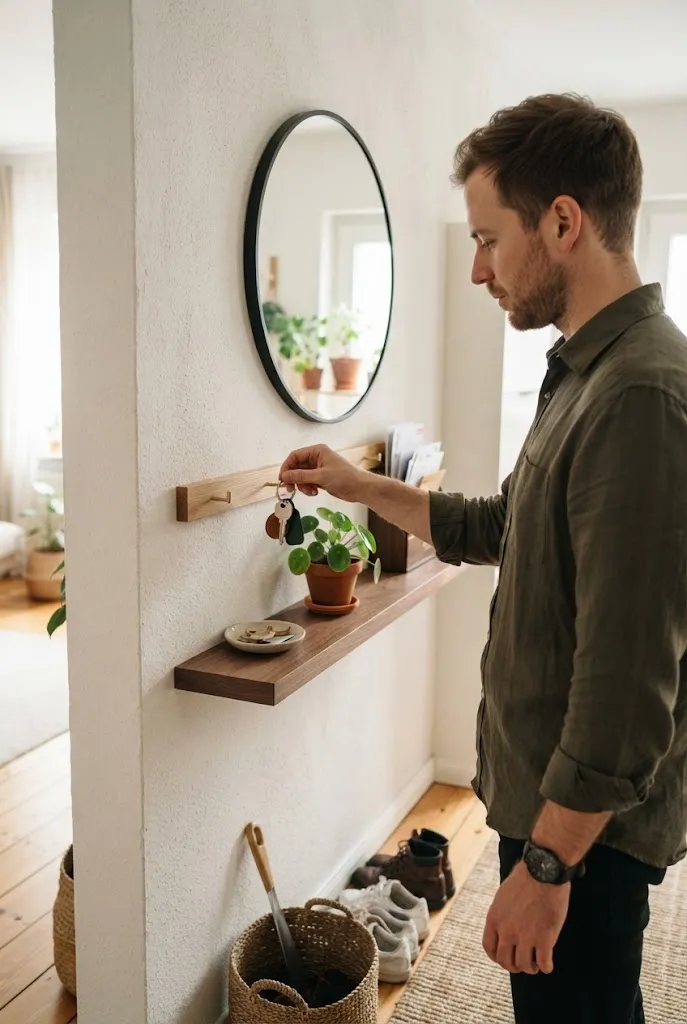
A slim wood or metal rail can provide key storage without making the wall feel crowded. This approach is especially useful in a small apartment or narrow hallway.
Materials & Tools
- Narrow wooden or metal rail
- 3–5 small hooks
- Screws
- Wall anchors
- Drill
- Screwdriver
- Measuring tape
- Level
- Pencil
- Sandpaper if using wood
- Optional wood stain or paint
Steps
- Measure the wall area where the rail will be installed.
- Cut the rail to fit the available space if necessary.
- Sand the edges of a wooden rail to remove rough spots.
- Apply stain or paint if desired and let it dry fully.
- Measure and mark evenly spaced hook positions.
- Attach the hooks to the rail.
- Hold the rail against the wall and mark the mounting points.
- Drill pilot holes and install wall anchors where necessary.
- Secure the rail with screws and check it with a level.
- Test it with your heaviest everyday key ring before relying on it.
Quick Tip: Choose a rail that is wide enough for your household’s keys but narrow enough to preserve walking space.
3. Repurposed Picture Frame Key Organizer
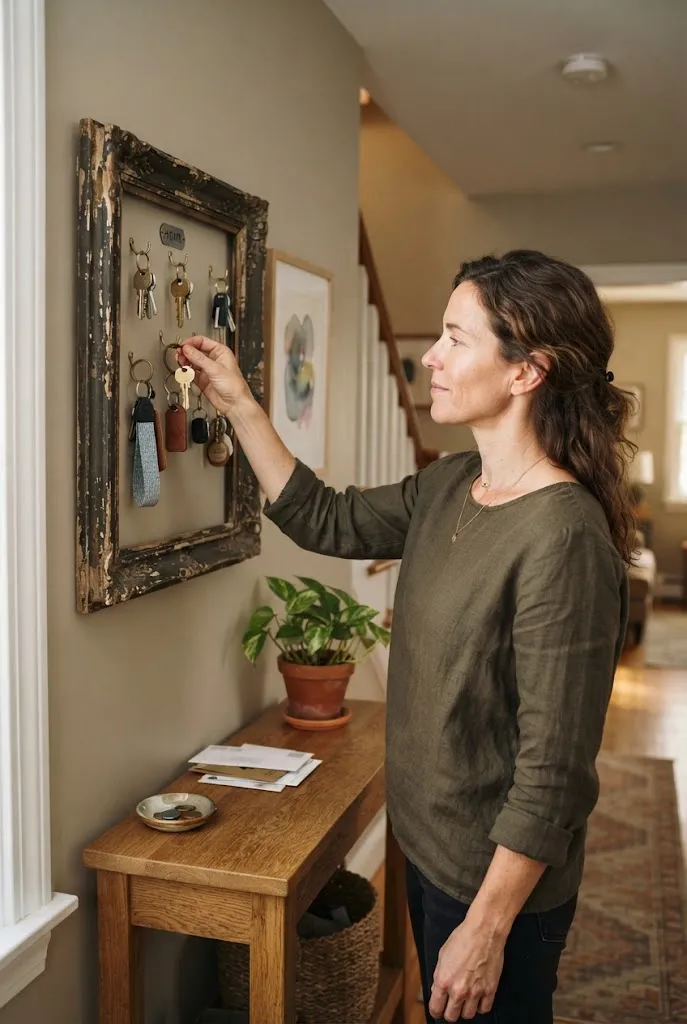
An old picture frame can become decorative key storage with very little modification. DIY Key Holder IdeasRemove the glass and backing, then attach hooks across the lower portion or inside the frame.
Materials & Tools
- Old picture frame
- 3–6 small hooks
- Screws
- Screwdriver
- Drill
- Sandpaper DIY Key Holder Ideas
- Paint or spray paint
- Measuring tape
- Pencil
- Wall anchors
- Optional decorative backing board
Steps
- Remove the glass, backing, and any existing hardware from the frame.
- Inspect the frame for loose joints and repair them if necessary.
- Sand chipped or rough areas.
- Paint or refinish the frame and let it dry completely.
- Measure the inside width of the frame.
- Mark where the hooks will go, keeping them evenly spaced.
- Drill pilot holes if necessary.
- Attach the hooks securely.
- Add a thin wood or fabric backing if the frame needs additional visual interest.
- Mount the finished frame to the wall using suitable hardware.
Common Mistake: Using a frame that is too shallow for the hooks.
Better Approach: Check the hook depth and wall clearance before attaching the frame.
4. Wooden Shelf With Key Hooks
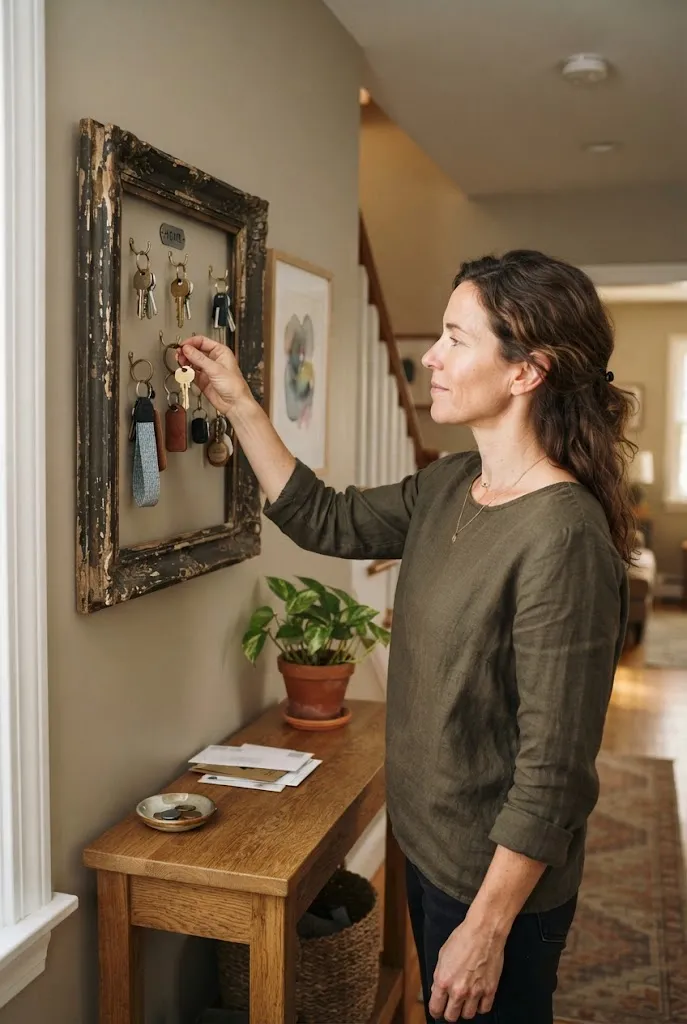
Combine storage and display by adding hooks beneath a narrow floating shelf. The top can hold sunglasses, a small plant, mail, or decorative objects while keys hang underneath.
Materials & Tools
- Narrow wooden shelf
- 3–5 hooks
- Screws
- Wall anchors or shelf mounting hardware
- Drill
- Screwdriver
- Measuring tape
- Level
- Pencil
- Sandpaper
- Optional stain or paint
Steps
- Choose a shelf deep enough to hold small items without obstructing the entryway.
- Sand the shelf if necessary.
- Paint or stain it and allow it to dry fully.
- Turn the shelf upside down and mark the hook positions underneath.
- Pre-drill holes where needed.
- Attach the hooks underneath the shelf.
- Locate the wall studs or determine suitable anchor positions.
- Mount the shelf securely and check that it is level.
- Add a small tray, plant, or decorative item to the top.
- Hang keys below while keeping the shelf surface uncluttered.
This is particularly practical near the front door because several small everyday items can share one compact station. DIY Key Holder Ideas
5. Decorative Ceramic Knob Key Holder DIY Key Holder Ideas
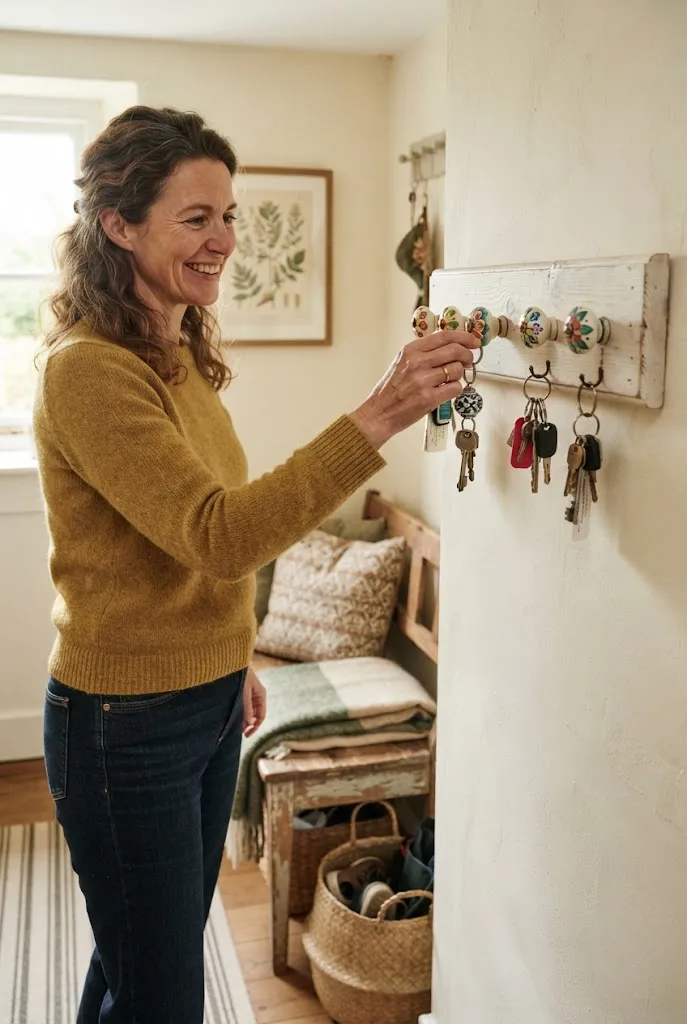
Ceramic cabinet knobs can turn a basic wood board into a more decorative organizer. DIY Key Holder Ideas Look for knobs with different shapes, subtle patterns, or colors that coordinate with the room.
Materials & Tools
- Small wooden board
- 4–6 ceramic cabinet knobs
- Matching screws or knob hardware
- Drill and drill bit
- Measuring tape
- Pencil
- Screwdriver
- Sandpaper
- Optional paint or wood stain
- Wall anchors
Steps
- Measure the board and decide how many knobs will fit comfortably.
- Mark evenly spaced positions for the knobs.
- Drill holes according to the hardware size.
- Sand the board, especially around the drilled holes.
- Paint or stain the board if desired and allow it to dry.
- Insert the knob hardware through the back of the board.
- Tighten each ceramic knob carefully so it is secure without overtightening.
- Install wall-mounting hardware on the back.
- Mount the board securely near the entryway.
- Test each knob with a key ring before filling the holder.
This option is useful when you want the key holder to feel like part of the decor rather than a purely functional storage piece.
6. Leather Strap Key Holder

Leather straps offer a softer alternative to traditional hooks. Attach several short leather loops to a wood backing board and use each loop to hold a key ring.
Materials & Tools
- Wooden backing board
- 3–5 leather strips
- Leather punch or sharp awl
- Screws or decorative rivets
- Drill
- Screwdriver
- Measuring tape
- Pencil
- Sandpaper
- Leather scissors or utility knife
- Optional wood stain
Steps
- Cut leather strips into equal lengths, leaving enough length to form loops.
- Mark the center of each strip where it will attach to the board.
- Punch or drill appropriate holes in the leather.
- Sand and finish the wooden board if needed.
- Mark evenly spaced attachment points on the board.
- Fold each leather strip into a loop.
- Secure each loop with screws or suitable rivets.
- Check that each loop opens enough to accept a key ring.
- Mount the board to the wall using appropriate anchors.
- Test the loops with your everyday keys.
Natural tan leather works well with warm woods, while dark brown or black leather can give the organizer a more masculine or modern character.
7. Pegboard Key Organization Station
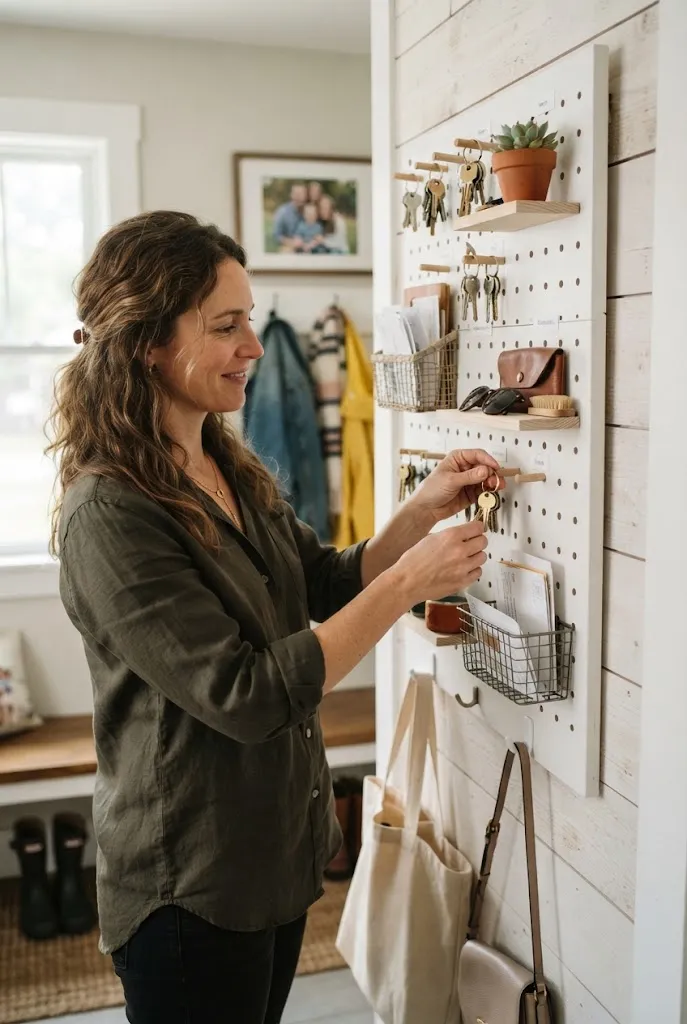
A small pegboard provides flexible storage that can change as your needs change. Use hooks for keys and add a tiny shelf or basket for mail, sunglasses, DIY Key Holder Ideas or other grab-and-go items.
Materials & Tools
- Small pegboard
- Pegboard hooks
- Small pegboard shelf or basket
- Wall spacers
- Screws
- Wall anchors
- Drill
- Screwdriver
- Level
- Measuring tape
- Pencil
Steps
- Measure the wall area and select a pegboard that fits comfortably.
- Mark the location where the pegboard will be installed.
- Install spacers behind the pegboard if required for your chosen hooks.
- Secure the pegboard to studs or suitable wall anchors.
- Check that it is level.
- Insert hooks at convenient heights for everyday keys.
- Add a small shelf or basket below or beside the hooks.
- Place frequently used keys on the easiest-to-reach hooks.
- Reserve extra hooks for occasional keys or accessories.
- Rearrange the pegboard as your storage needs change.
Best For: Families, home offices, mudrooms, and growing collections of everyday accessories.
8. Farmhouse Key Holder With Mason Jar
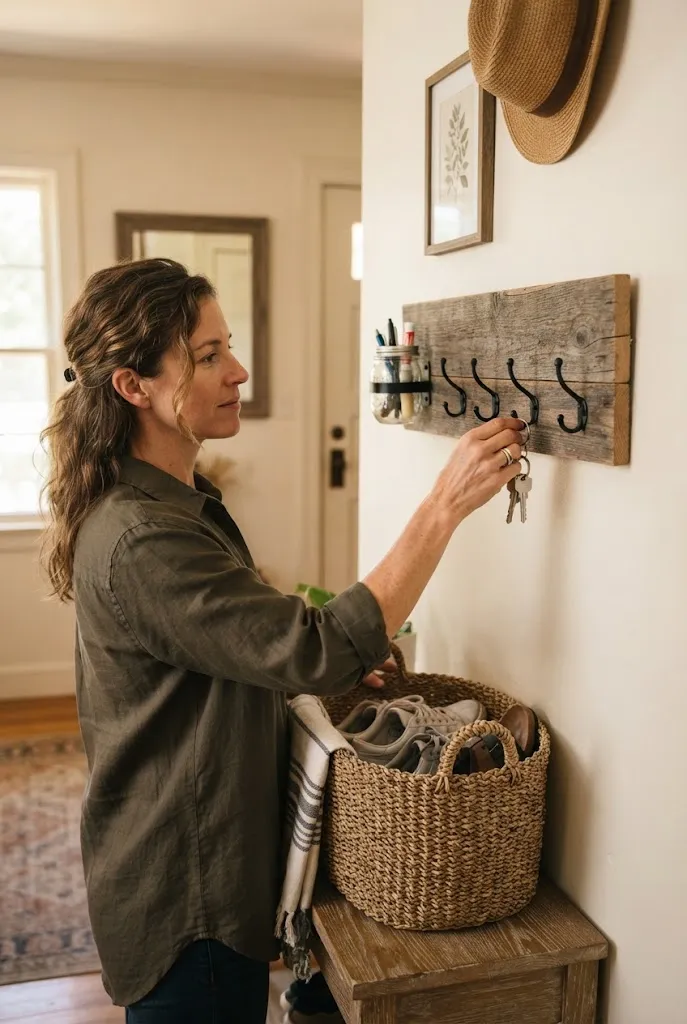
For a farmhouse-inspired entryway, pair a reclaimed wood board with hooks and a small mason jar. The jar can hold pens, spare change, or tiny accessories while the hooks handle keys.
Materials & Tools
- Reclaimed or new wood board
- 3–5 black metal hooks
- Small mason jar
- Jar mounting bracket
- Screws
- Drill
- Screwdriver
- Sandpaper
- Wood stain
- Measuring tape
- Level
- Wall anchors
Steps
- Inspect reclaimed wood for loose nails, splinters, or damaged areas.
- Remove any old hardware and sand the board thoroughly.
- Apply stain if you want a warmer finish.
- Mark positions for the key hooks.
- Attach the hooks with appropriate screws.
- Position the mason jar bracket beneath or beside the hooks.
- Secure the jar bracket to the board.
- Test the bracket with the empty jar before adding contents.
- Mount the complete organizer to the wall.
- Use the jar for lightweight items such as spare change or pens.
Use restrained finishes rather than adding too many rustic decorations. DIY Key Holder Ideas The combination of useful storage and natural materials is what gives this idea its appeal.
9. Cork Board Key Holder
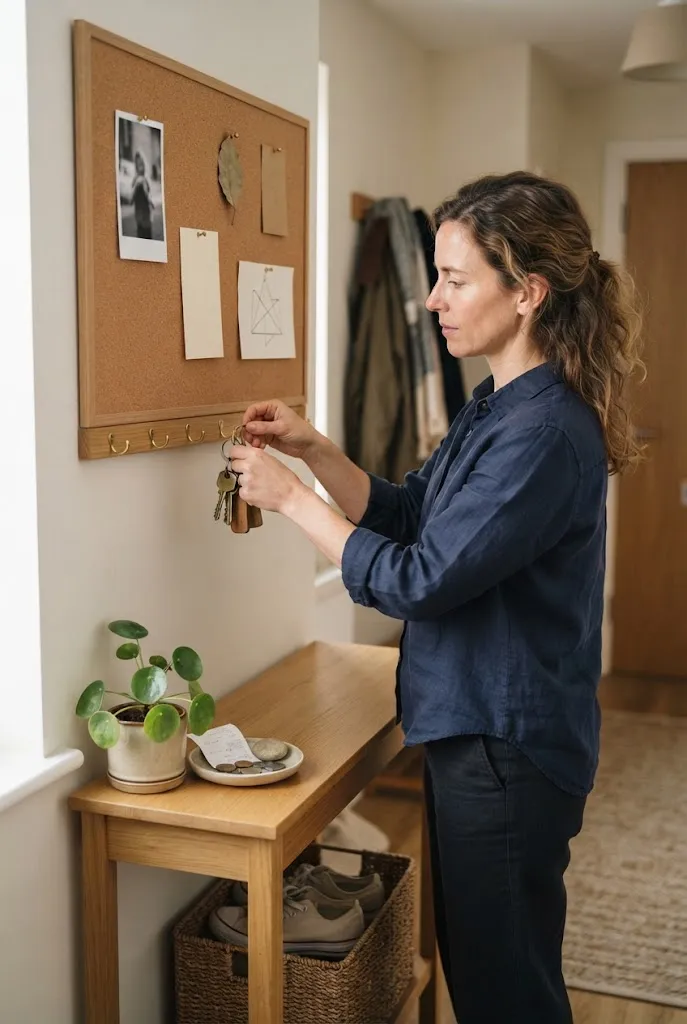
A cork board can serve as both a key organizer and a small message center. DIY Key Holder Ideas Add hooks along the lower edge while keeping the upper portion open for reminders, photos, or household notes.
Materials & Tools
- Cork board with a sturdy frame
- 3–5 small hooks
- Short screws
- Drill
- Screwdriver
- Measuring tape
- Pencil
- Wall anchors
- Level
- Optional push pins
Steps
- Choose a cork board with a sturdy frame capable of supporting the hooks.
- Measure the lower section and mark hook positions.
- Pre-drill small holes through the frame where needed.
- Attach the hooks without damaging the cork.
- Mount the cork board securely using wall anchors.
- Check that the board is level.
- Use the cork area for a limited number of reminders or photos.
- Keep frequently used keys on the lower hooks.
- Remove outdated notes regularly so the station stays useful.
Editor’s Note: Keep the cork section visually organized. Too many notes and accessories can make a small entryway feel cluttered rather than functional.
10. Reclaimed Wood Key Holder With House Numbers

Turn a small reclaimed wood board into a personalized entryway accent by adding house numbers above or beside the hooks.
Materials & Tools
- Reclaimed wood board
- 3–5 key hooks
- Decorative house numbers
- Screws
- Drill
- Screwdriver
- Sandpaper
- Wood stain or paint
- Measuring tape
- Level
- Wall anchors
Steps
- Clean and inspect the reclaimed wood.
- Sand rough edges and remove splinters.
- Apply stain, paint, or a clear finish if desired.
- Mark the hook positions along the lower section.
- Drill pilot holes and install the hooks.
- Lay out the house numbers before attaching them.
- Mark the number positions so they remain straight and evenly spaced.
- Secure the numbers according to their hardware.
- Attach mounting hardware to the back of the board.
- Mount the finished organizer and check that everything is secure.
The key is to keep the numbers subordinate to the storage function. A simple black or brass finish usually provides enough contrast without making the board feel overly decorative.
11. Rope and Wood Key Rack DIY Key Holder Ideas
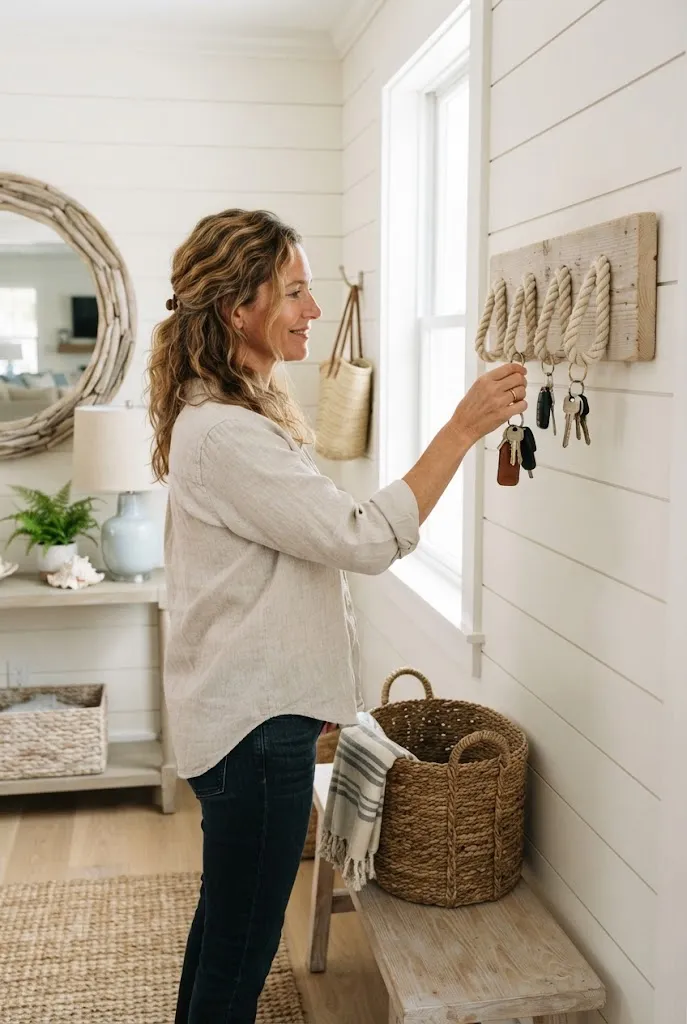
A combination of rope and wood brings a casual handmade quality to a key rack. Drill small holes into a narrow board and use sturdy rope loops or knots as individual hanging points.
Materials & Tools
- Narrow wooden board
- Durable cotton or utility rope
- Drill
- Wood drill bit
- Scissors or utility knife
- Sandpaper
- Measuring tape
- Pencil
- Wood stain or paint
- Wall anchors
- Screws
Steps
- Measure and cut the wooden board to the desired size.
- Sand every edge until smooth.
- Mark evenly spaced locations for the rope loops.
- Drill holes large enough for the rope to pass through.
- Cut equal lengths of rope.
- Thread each piece through a hole and tie a secure knot on the back.
- Test each knot by pulling gently.
- Apply stain or paint to the board if desired.
- Attach wall-mounting hardware.
- Mount the rack and hang keys from the rope loops.
Do:
- Use durable rope with secure knots.
- Sand all exposed wood edges.
- Check that the mounting hardware is strong enough for repeated use.
Don’t:
- Leave sharp drilled edges unfinished.
- Use decorative cord that cannot support everyday handling.
12. Small Entryway Shelf With Mail Slot and Hooks

A compact shelf can become a mini command center when it combines a mail slot, a few hooks, and a small surface.
Materials & Tools
- Wooden shelf board
- Two small side pieces or dividers
- 3–4 key hooks
- Screws
- Wood glue
- Drill
- Screwdriver
- Sandpaper
- Measuring tape
- Level
- Wall anchors
- Paint or stain
Steps
- Measure the available wall space carefully.
- Cut the shelf and side pieces to size if building from raw wood.
- Sand all pieces before assembly.
- Use wood glue and screws to assemble the shelf structure.
- Add a divider or slot for incoming mail.
- DIY Key Holder Ideas Mark and attach the key hooks beneath the shelf.
- Apply paint or stain and let it dry completely.
- Mark the mounting position on the wall.
- Secure the shelf to studs or appropriate anchors. DIY Key Holder Ideas
- Add only lightweight items to the top surface.
This is a stronger choice than a basic key rack when the real problem is entryway clutter. Keep the shelf shallow so it doesn’t interfere with the door or walking path.
13. Vintage Drawer Pull Key Holder
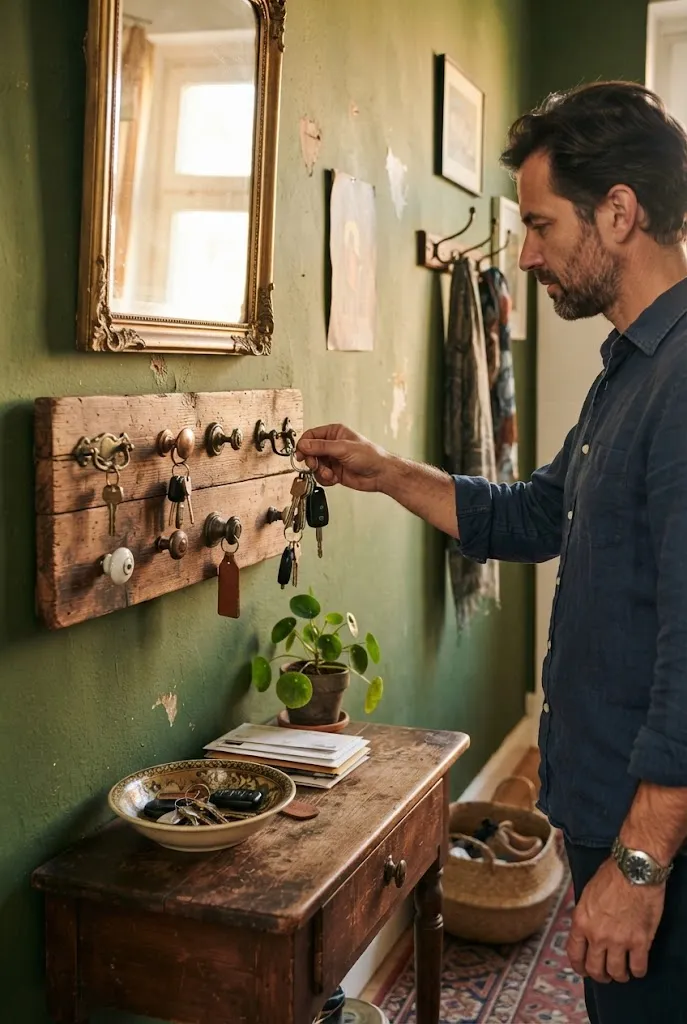
Old drawer pulls can be repurposed as sturdy key hooks. Mount several mismatched pulls onto a wooden board for an eclectic look, or use matching hardware for a more orderly arrangement.
Materials & Tools
- Small wooden board
- 4–6 vintage drawer pulls
- Existing or replacement screws
- Drill
- Screwdriver
- Sandpaper
- Measuring tape
- Pencil
- Wood stain or paint
- Wall anchors
Steps
- Collect drawer pulls that are sturdy enough for repeated use.
- Clean and inspect the hardware.
- Sand and refinish the board if necessary.
- Arrange the drawer pulls on the board before drilling.
- Mark the mounting holes for each pull.
- Drill pilot holes.
- Attach each drawer pull securely.
- Check that none of the hardware overlaps.
- Install wall-mounting hardware.
- Mount the organizer and test each pull with a key ring.DIY Key Holder Ideas
This project is especially good for salvaged materials because small variations in the hardware can become part of the design.
14. Magnetic Key Holder
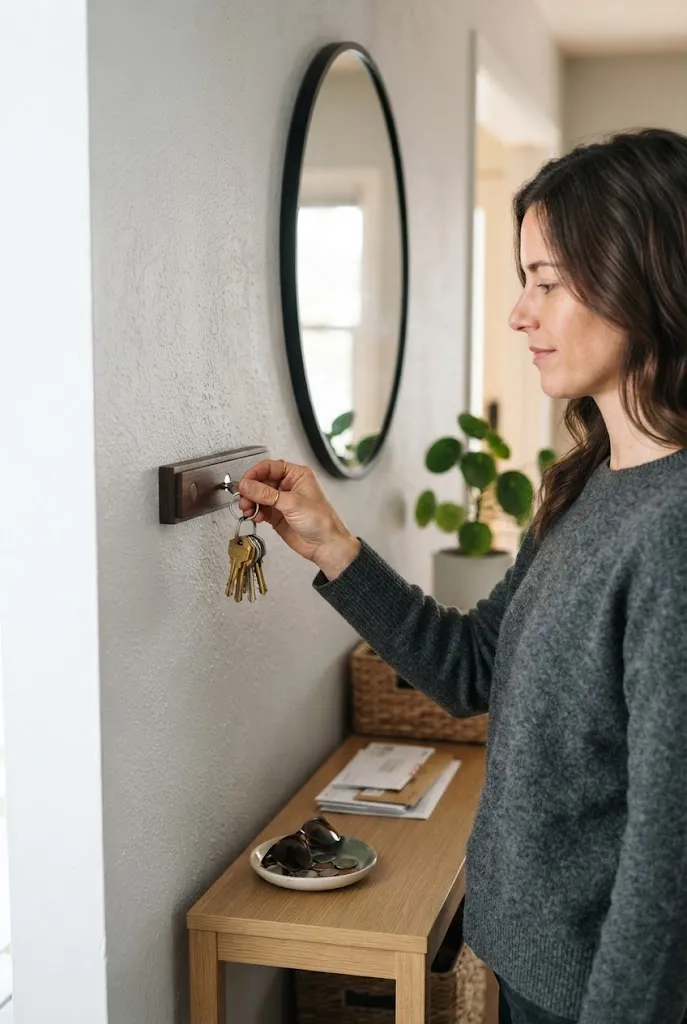
A magnetic strip can provide a clean, hardware-light solution for certain keys and small metal accessories. Mount the strip securely and test its holding strength before relying on it for multiple key rings.
Materials & Tools
- Purpose-appropriate magnetic strip or magnetic organizer
- Mounting screws or manufacturer-approved hardware
- Wall anchors if required
- Drill
- Screwdriver
- Measuring tape
- Level
- Pencil
- Cleaning cloth
Steps
- Select a magnetic system rated for the weight you plan to store.
- Clean the wall surface where the holder will be installed.
- DIY Key Holder Ideas Mark the mounting points.
- Drill pilot holes where necessary.
- Install appropriate wall anchors.
- Secure the magnetic holder firmly.
- Test the magnetic strength with one lightweight key ring.DIY Key Holder Ideas
- Gradually add additional keys.
- Remove any items that cause the magnet to release unexpectedly.
Common Mistake: Assuming every magnetic strip has enough strength for a heavy collection.
Better Approach: Choose a purpose-appropriate magnetic system and test it with your actual key ring before installing several.
15. Wooden House-Shaped Key Holder DIY Key Holder Ideas
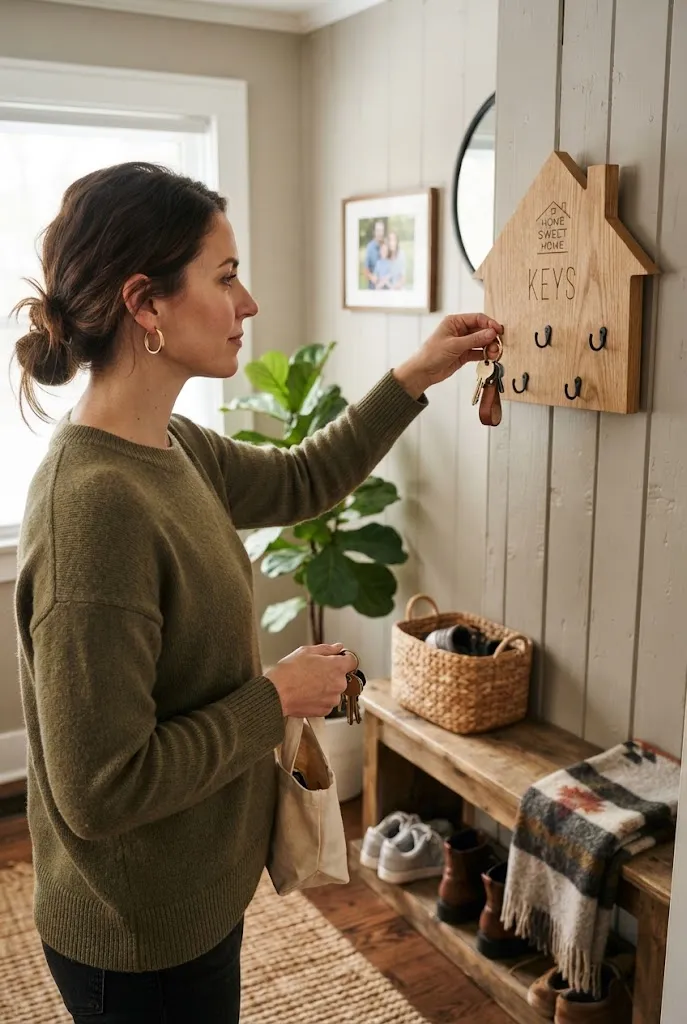
A small house-shaped backing board adds personality to a practical storage project. DIY Key Holder Ideas Cut or assemble the wood into a simple roof shape, then install hooks along the lower section.
Materials & Tools
- Wooden board
- Pencil
- Ruler
- Jigsaw or handsaw
- Sandpaper
- 3–5 hooks
- Screws
- Drill
- Paint or stain
- Wall anchors
- Safety glasses
Steps
- Sketch a simple house silhouette on the wooden board.
- Mark the roof angles and bottom section.
- Put on safety glasses and cut the shape carefully with a suitable saw.
- Sand all edges thoroughly.
- Paint or stain the house shape and allow it to dry.
- Mark hook positions across the lower section.
- Drill pilot holes and attach the hooks.
- Add mounting hardware to the back.
- Secure the organizer to the wall.
- Test the hooks with your actual keys.
Paint it a muted color for a child’s family-friendly mudroom, or leave the wood natural for a more understated adult entryway.
16. Industrial Pipe Key Rack
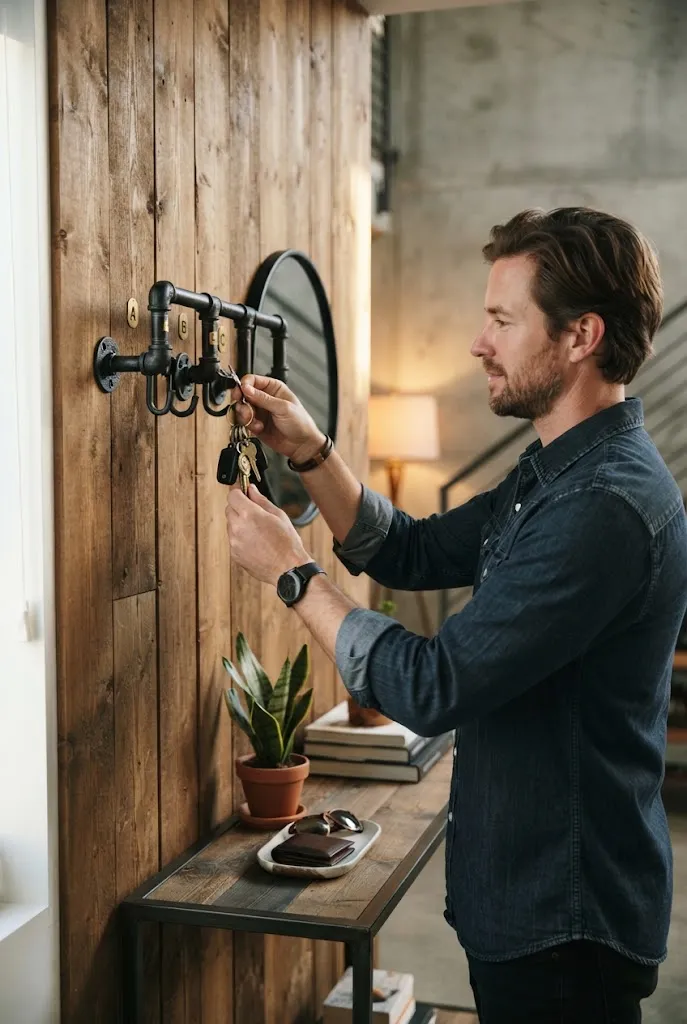
Black metal pipe fittings can create a sturdy industrial-style key rack. DIY Key Holder Ideas Combine a short pipe section with wall flanges or use small pipe fittings as individual hooks.
Materials & Tools
- Black metal pipe fittings
- Pipe nipples or short pipe sections
- Wall flanges
- Screws
- Wall anchors
- Drill
- Screwdriver
- Measuring tape
- Level
- Cleaning cloth
Steps
- Plan the pipe arrangement before attaching anything to the wall.
- DIY Key Holder Ideas Clean the fittings to remove dust or manufacturing residue.
- Assemble the pipe pieces and flanges by hand.
- Check that all threaded connections are tight.
- Measure the wall and mark the mounting points.
- Drill pilot holes.
- Install wall anchors where studs are unavailable.
- Secure the pipe assembly to the wall.
- Check that the rack doesn’t wobble.
- Hang several key rings and test the rack before regular use.DIY Key Holder Ideas
The look works particularly well with exposed wood, brick, concrete-inspired finishes, or darker entryway furniture.
17. Embroidery Hoop Key Holder

An embroidery hoop can be turned into a lightweight decorative organizer with fabric and small hooks or sewn loops.
Materials & Tools
- Medium or large wooden embroidery hoop
- Durable linen or canvas fabric
- Small hooks or fabric loops
- Needle and strong thread
- Scissors
- Pencil
- Measuring tape
- Screwdriver
- Optional fabric adhesive
Steps
- Choose fabric that is strong enough for repeated handling.
- Cut a fabric piece several inches larger than the hoop.
- Separate the two sections of the embroidery hoop.
- Place the fabric over the inner hoop.
- Press the outer hoop into place and tighten it.
- Trim excess fabric from the back.
- Sew small loops or attach lightweight hooks to the lower portion.
- Check that the fabric remains tightly stretched.
- Mount the finished hoop using a suitable wall hook.
- Hang lightweight key rings and avoid overloading the fabric.
Quick Tip: A tightly stretched canvas or linen will usually provide a more stable base than very thin fabric.
18. Key Holder With a Small Catch-All Tray

Sometimes keys aren’t the only thing that needs a home. DIY Key Holder Ideas Add a shallow tray below or beside the hooks for coins, DIY Key Holder Ideas earbuds, sunglasses, or other small items.
Materials & Tools
- Wooden board
- 3–4 key hooks
- Small shallow wooden tray
- Screws
- Drill
- Screwdriver
- Sandpaper
- Measuring tape
- Pencil
- Level
- Wall anchors
- Optional stain or paint
Steps
- Measure the board and determine where the hooks and tray will sit.
- Sand the board and tray until smooth.
- Paint or stain both pieces if desired.
- Mark evenly spaced hook positions.
- Attach the hooks to the board.
- Position the tray beneath the hooks, leaving enough clearance for key rings.
- Secure the tray firmly with screws.
- Add mounting hardware to the back of the board.
- Mount the organizer level on the wall.
- Use the tray only for lightweight everyday accessories.
| Feature | Best Use |
|---|---|
| Hooks | Keys and key rings |
| Shallow tray | Coins and small accessories |
| Upper shelf | Mail or decorative items |
The result is a compact drop zone rather than a single-purpose hook rack.
19. Mason Jar Wall Key Organizer
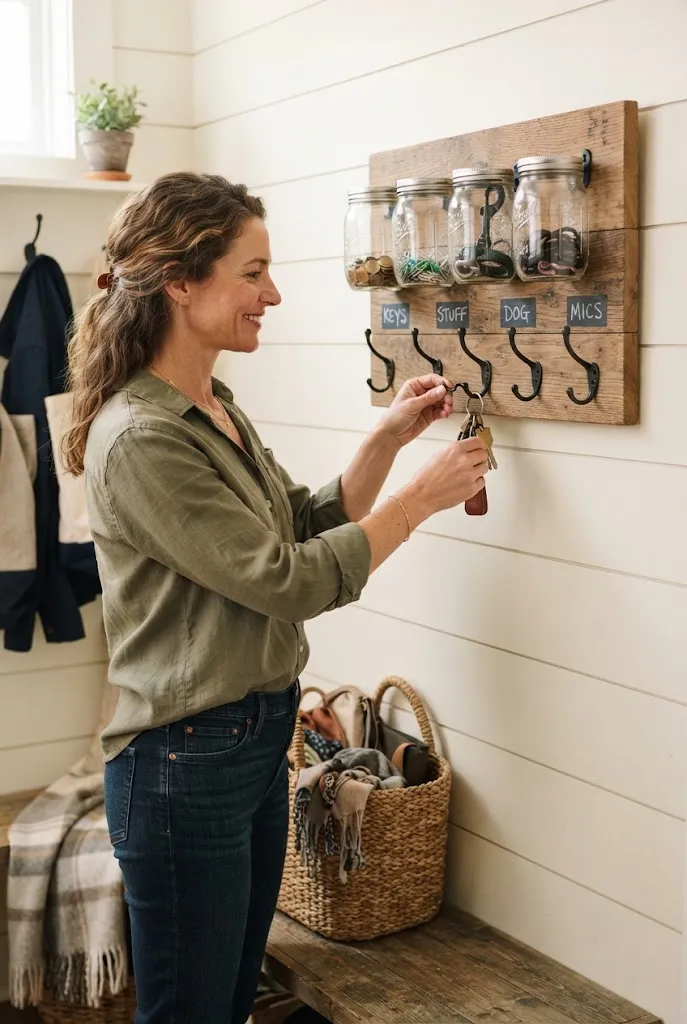
Mount small mason jars beneath or beside a wooden key board to create additional storage for tiny entryway items. DIY Key Holder Ideas The jars can hold spare change, dog-walking accessories, clips, or other small objects.
Materials & Tools
- Wooden board
- 3–4 key hooks
- Small mason jars
- Mason jar mounting brackets
- Screws
- Drill
- Screwdriver
- Sandpaper
- Measuring tape
- Pencil
- Wall anchors
Steps
- Choose jars that fit comfortably within the board’s width.
- Sand and finish the wooden board.
- Mark positions for the key hooks.
- Attach the hooks securely.
- Position the jar brackets beneath or beside the hooks.
- Secure each bracket with appropriate screws.
- Insert the empty jars and check that they sit firmly.
- Mount the completed organizer to the wall.
- Add only lightweight contents to the jars.
- Check the brackets periodically for looseness.
Use securely mounted jar holders rather than relying on adhesive alone for heavier contents.
20. Chalkboard Key Station
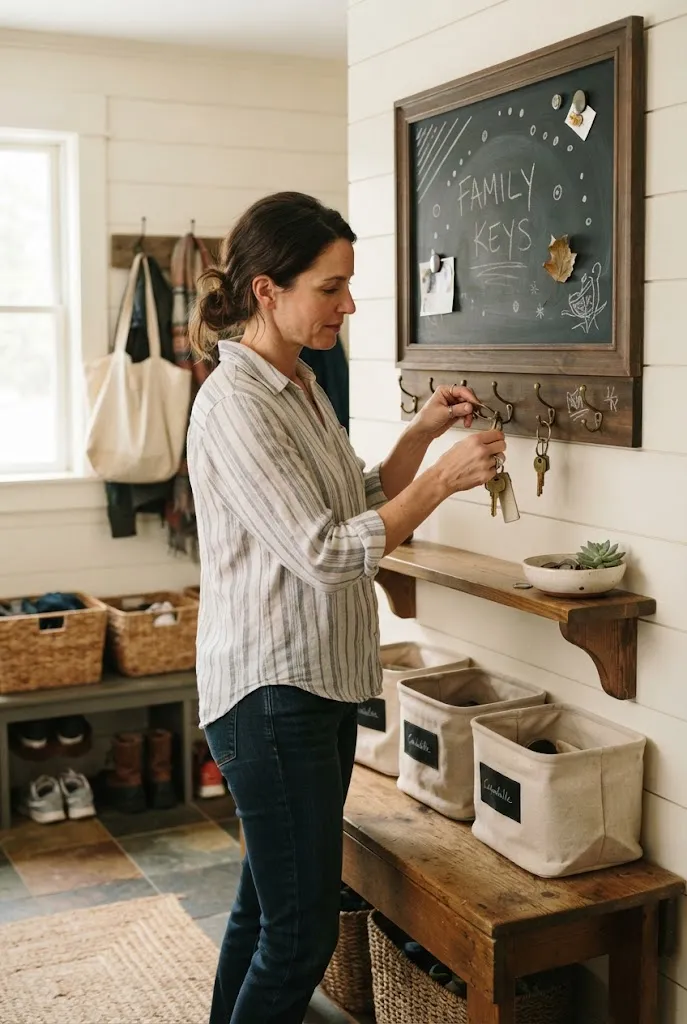
A small chalkboard combined with hooks can help turn a key holder into a family organization station. DIY Key Holder Ideas Keep the writing area large enough for useful reminders without letting the board become visually overwhelming.
Materials & Tools
- Small framed chalkboard
- 3–5 key hooks
- Screws
- Drill
- Screwdriver
- Measuring tape
- Pencil
- Level
- Wall anchors
- Chalk
Steps
- Choose a chalkboard with a strong frame.
- Mark the hook positions along the bottom of the frame.
- Drill pilot holes if needed.
- Attach the hooks securely.
- Mark the wall mounting points.
- Install anchors where required.
- Mount the chalkboard and check that it is level.
- Assign hooks to household members if useful.
- Keep written reminders short and easy to update.
- Erase outdated notes regularly.
For households with children, assign each hook to a family member and use simple visual markers rather than relying on complicated labels.
21. Branch-Inspired Key Rack
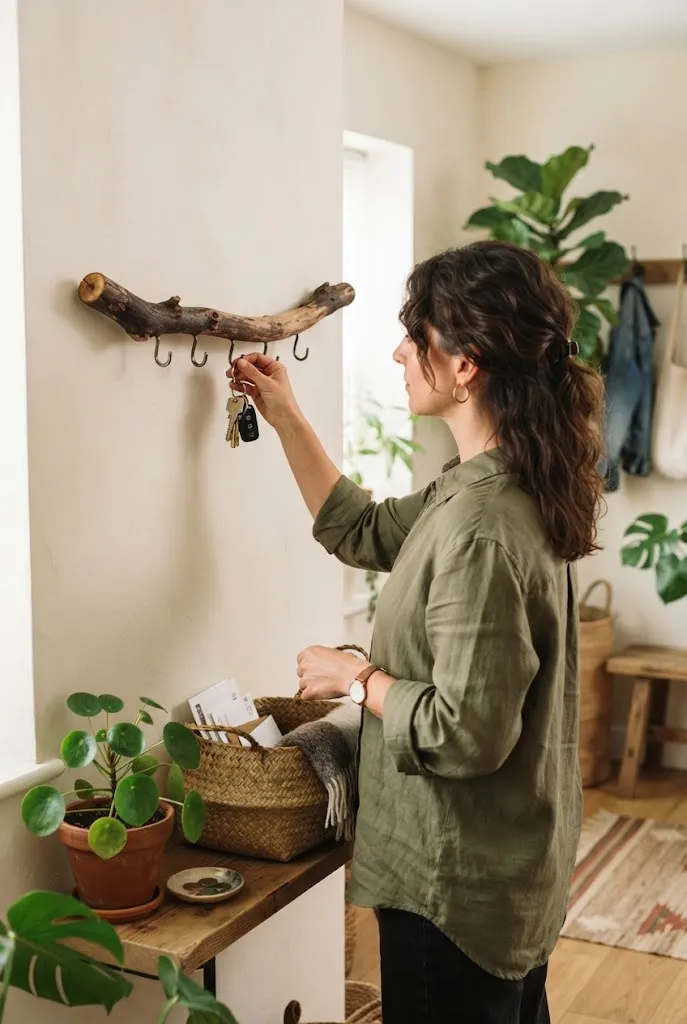
For a nature-inspired interior, use a carefully prepared branch as the decorative foundation for a key rack. Sand rough areas, DIY Key Holder Ideas remove loose bark when necessary, and secure the branch firmly before adding hooks.
Materials & Tools
- Sturdy dry branch
- DIY Key Holder Ideas Small key hooks
- Screws
- Drill
- Sandpaper
- Wire brush if needed
- Clear wood finish
- Wall mounting brackets DIY Key Holder Ideas
- Measuring tape
- Level
Steps
- Choose a dry branch that is strong and free from rot.
- Remove loose bark and inspect the branch for weak areas.
- Sand rough sections carefully.
- Wipe away dust with a clean cloth.
- Apply a clear wood finish if desired and let it cure fully.
- Mark locations for the hooks.
- Drill small pilot holes.
- Attach the hooks securely.
- Install sturdy mounting brackets on the back or underneath.
- Secure the branch to the wall and test it with several key rings.
The irregular shape gives each key a slightly different position, creating a more organic display than a straight board.
22. Floating Cubby Key Holder
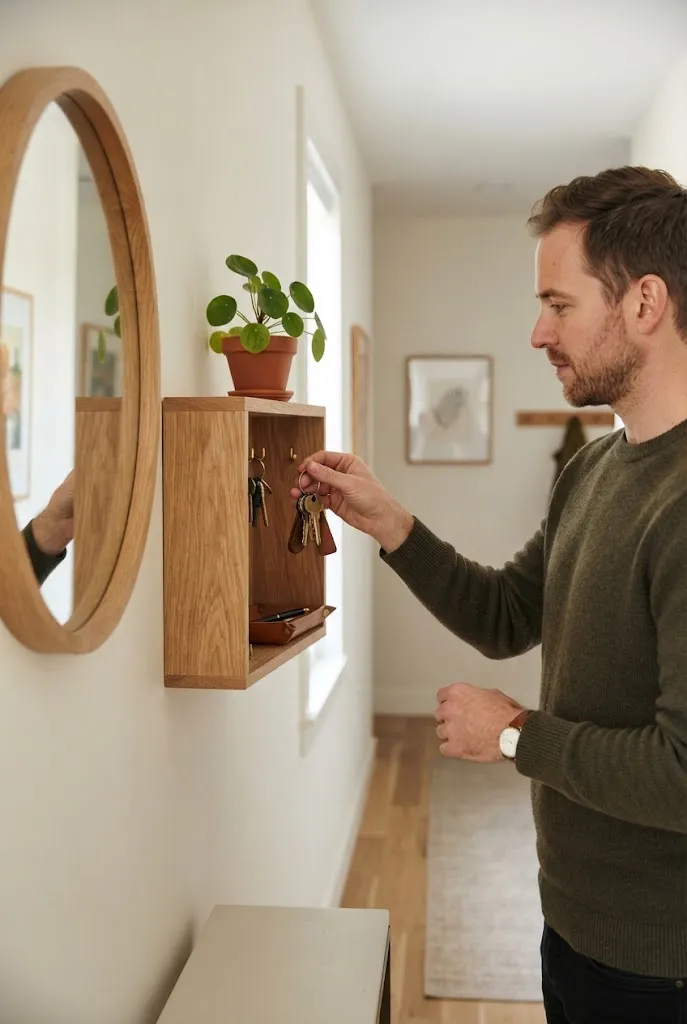
A small wall-mounted cubby can hide keys while providing a surface for small accessories. Add hooks inside the compartment and use the top for a small plant, framed photo, or decorative object.
Materials & Tools
- Small wooden cubby
- 2–4 small hooks
- Screws
- Drill
- Screwdriver
- Sandpaper
- Measuring tape
- Level
- Wall anchors
- Optional paint or stain
Steps
- Choose a cubby with enough interior depth for your key rings.
- Sand rough edges.
- Paint or stain the cubby if desired.
- Mark hook positions on the inside back panel.
- Attach the hooks securely.
- Determine the wall mounting location.
- Install anchors or screw directly into studs where available.
- Mount the cubby and check that it is level.
- Add a lightweight decorative item to the top.
- Keep bulky keychains from blocking the cubby’s opening. DIY Key Holder Ideas
This option is useful when you prefer a slightly more substantial organizer that doesn’t leave keys completely exposed.
23. Personalized Initial Key Holder
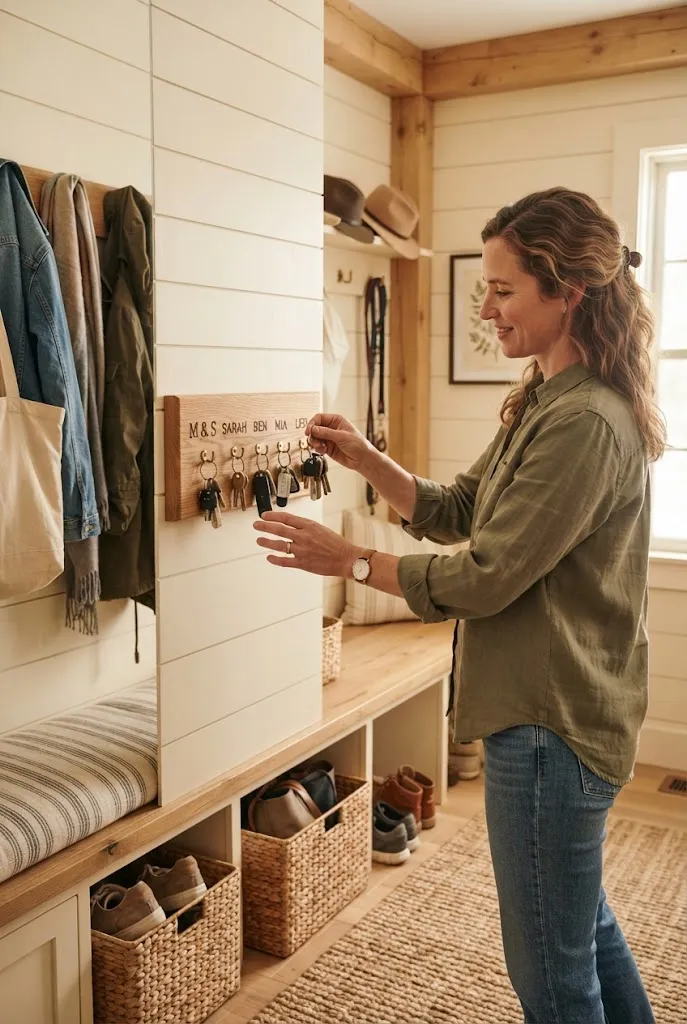
Add wooden or metal initials above individual hooks to create a personalized organizer for a family or shared household.
Materials & Tools
- Wooden board
- 3–5 hooks
- Wooden or metal initials DIY Key Holder Ideas
- Screws
- Drill
- Screwdriver
- Measuring tape
- Pencil
- Sandpaper
- Paint or stain
- Wall anchors
Steps
- Choose a board large enough for all household members.
- Sand the board and finish it with paint or stain.
- Mark the hook positions along the lower portion.
- Attach the hooks with suitable screws.
- Arrange the initials above their corresponding hooks.
- Mark the mounting points for the initials.
- Attach the initials securely.
- Install wall-mounting hardware.
- Mount the organizer at a comfortable height.
- Assign each person their own hook to make daily use easier.
Best For: Family homes, shared apartments, and mudrooms with multiple household members.
24. Reclaimed Window Frame Key Organizer
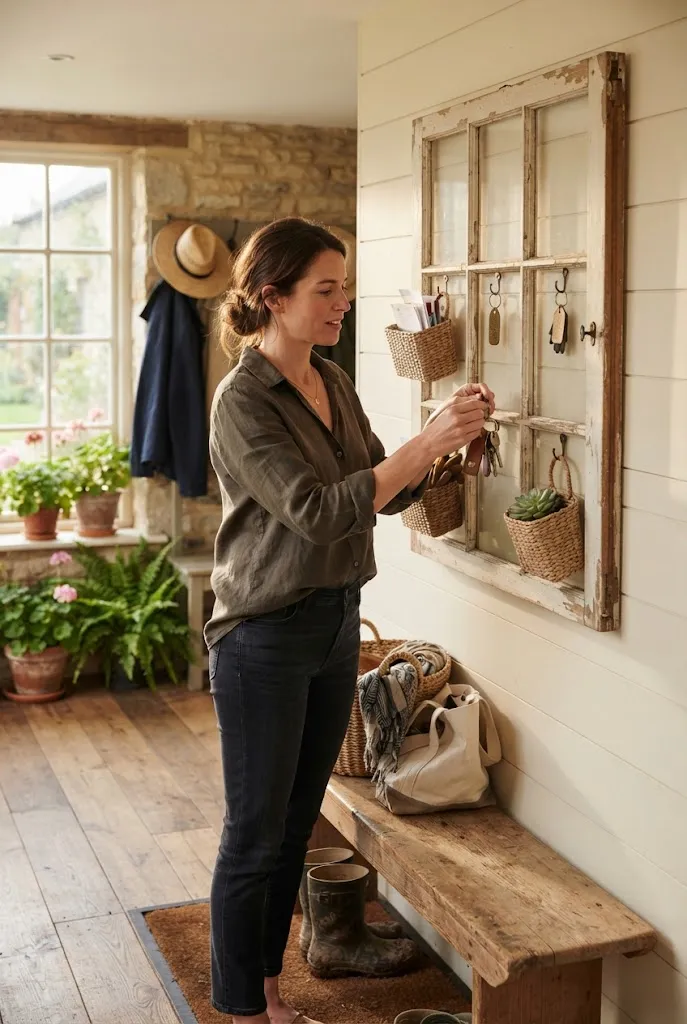
An old window frame can become a larger decorative key station. Remove fragile glass if necessary and use the individual frame sections to create separate visual zones for hooks, DIY Key Holder Ideas small baskets, or notes. DIY Key Holder Ideas
Materials & Tools
- Reclaimed wooden window frame
- Small key hooks
- Small baskets or trays
- Screws
- Drill
- Screwdriver
- Sandpaper
- Wood filler if needed
- Paint or clear finish
- Wall anchors
- Measuring tape
- Level
- Safety glasses and gloves
Steps
- Inspect the frame carefully for damaged wood or loose joints.
- Remove fragile glass if it isn’t needed.
- Repair cracks or loose sections with suitable wood adhesive or filler.
- Sand rough areas carefully.
- Apply paint, stain, or a clear finish and let it cure.
- Decide which frame sections will hold hooks.
- Mark and drill pilot holes.
- Attach the hooks and any lightweight baskets.
- Use heavy-duty mounting hardware appropriate for the frame’s weight.
- Secure the frame to the wall and check that it is stable before adding keys.
Editor’s Note: Scale matters. A reclaimed window frame works best when the wall has enough surrounding space for it to read as an intentional focal point.
25. Hidden Cabinet Key Holder

For a cleaner-looking entryway, install hooks inside a small wall cabinet or shallow storage box. Closing the door keeps keys out of sight while preserving quick access.
Materials & Tools
- Small wall cabinet or shallow wooden box
- 3–5 small hooks
- Screws
- Drill
- Screwdriver
- Measuring tape
- Level
- Wall anchors
- Pencil
- Optional paint or stain
Steps
- Measure the cabinet interior to make sure key rings will fit.
- Mark hook positions on the interior back panel.
- Check that hooks won’t interfere with shelves or hinges.
- Drill pilot holes.
- Attach the hooks securely.
- Close the cabinet door to test clearance.
- If needed, remove or adjust interior shelves.
- Locate studs or install suitable wall anchors.
- Mount the cabinet securely.
- Test the door several times with keys hanging inside.
Do / Don’t
| Do | Don’t |
|---|---|
| Check door clearance before adding hooks. | Place bulky keychains where the door cannot close. |
| Keep hooks securely fastened. | Overload a lightweight cabinet door. |
| Use a shallow interior layout. | Let keys interfere with shelves or hinges. |
26. Custom Gallery-Style Key Wall
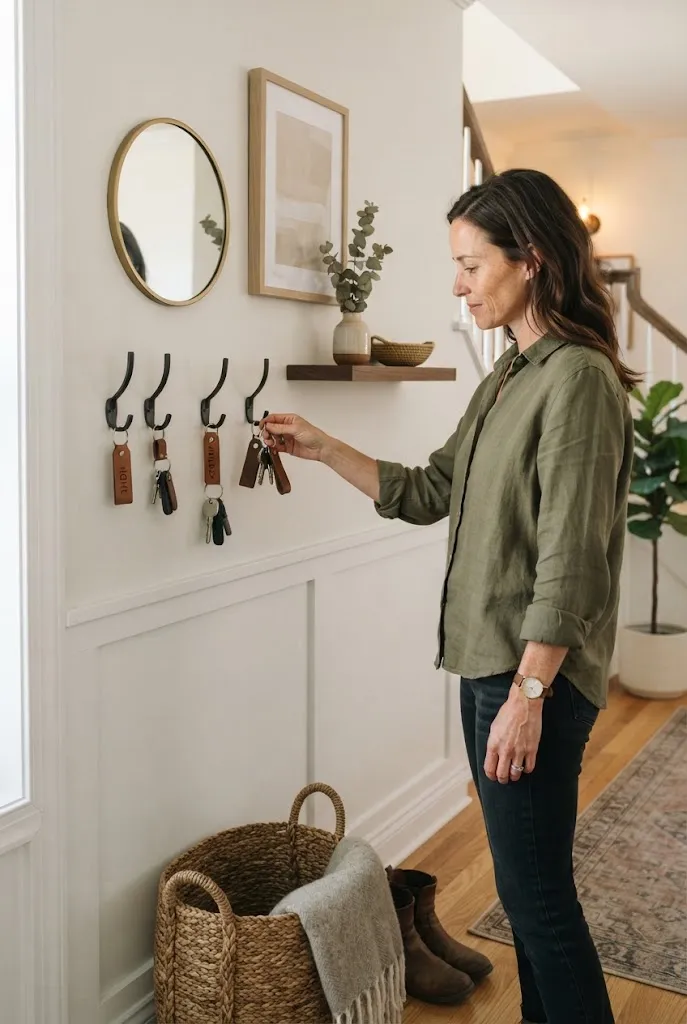
If keys are part of a larger drop zone, create a gallery-style arrangement using several small hooks, a framed print, a mirror, and a narrow shelf. DIY Key Holder Ideas The key holder doesn’t have to look like a traditional key holder at all.
Materials & Tools
- 3–6 decorative wall hooks
- Small round or rectangular mirror
- Framed artwork
- Narrow floating shelf
- Wall anchors
- Screws
- Drill
- Screwdriver
- Measuring tape
- Level
- Pencil
- Optional small basket
Steps
- Measure the wall and decide how much space the gallery should occupy.
- Choose a central piece such as a mirror.
- Arrange the artwork, shelf, and hooks on the floor before mounting anything.
- Create a balanced layout with the hooks positioned at an easy-to-reach height.
- Mark each item’s location on the wall.
- Install anchors appropriate for the wall surface and item weight.
- Mount the mirror and artwork first.
- Install the floating shelf.
- Add the key hooks around the main pieces.
- Step back and check the overall spacing before adding keys and accessories.
Group the pieces around a clear center line so the wall feels organized rather than randomly filled. This approach works especially well when you want practical storage to blend into a more decorative entryway.
Quick Tip: Keep frequently used keys on the easiest-to-reach hooks and reserve higher or less accessible spots for occasional sets.
How to Choose the Right DIY Key Holder
The best project depends less on how attractive the holder looks by itself and more on how your entryway actually functions.
| Storage Style | Best For | Main Advantage |
|---|---|---|
| Simple hook board | Everyday key storage | Easy to make |
| Floating shelf with hooks | Entryway drop zones | Adds surface storage |
| Pegboard | Busy households | Flexible arrangement |
| Cabinet organizer | Minimal interiors | Keeps keys hidden |
| Catch-all station | Keys and accessories | Handles more clutter |
| Decorative frame | Style-focused spaces | Blends with wall decor |
Before building, count the key rings your household uses regularly. Then consider bulky accessories such as car remotes, lanyards, or large decorative keychains. A holder that looks adequate when empty can quickly become overcrowded once everything is hanging from it.
DIY Key Holder Materials to Consider
Different materials create noticeably different results, so choose based on both style and durability.
- Wood: Versatile, easy to stain or paint, and suitable for most interior styles.
- Metal: Useful for contemporary or industrial designs and generally creates a visually lighter profile.
- Leather: Adds warmth and works especially well with wood.
- Rope: Gives simple projects a relaxed handmade character.
- Ceramic: Best used as decorative knobs or accents rather than structural components.
- Reclaimed materials: Excellent for farmhouse, vintage, and eclectic spaces when they are structurally sound.
For any wall-mounted project, use mounting hardware appropriate for the wall surface and the weight of the finished organizer.
Tips for Making Your Key Holder More Useful
A good organizer should reduce daily friction rather than become another object to manage.
- Place it near the door you actually use. A beautiful holder in the wrong location won’t solve much.
- Leave room between hooks. Key rings with remotes and larger accessories need more clearance.
- Keep everyday keys at an easy height. Less frequently used keys can occupy secondary positions.
- Add a catch-all surface if clutter is broader than keys. A small tray can prevent coins and sunglasses from spreading across the entryway.
- Match the scale to the wall. A tiny organizer can look lost on a large wall, while an oversized project may overwhelm a narrow hallway.
- Think about future additions. Leaving one or two spare hooks can make the organizer useful for longer.
A Simple Finishing Plan
For a wooden DIY key holder, a basic finishing sequence is usually enough:
- Sand rough surfaces and round sharp edges.
- Remove dust before painting or staining.
- Apply the chosen finish according to the product instructions.
- Allow the finish to dry or cure as directed.
- Attach the hooks and mounting hardware securely.
- Test the organizer with your actual key rings before putting it into everyday use.
The right project doesn’t need to be complicated. A simple board with thoughtfully placed hooks can be just as effective as an elaborate custom station when it fits the household and the available wall space.