32 Paper Mache Bowls DIY Ideas for Beautiful Handmade Decor
A paper mache bowl starts as newspaper, paste, and a mold you already own, and it can end up looking like hand-thrown pottery, woven basketry, or a gilded art piece. That range is why this craft keeps drawing people in. The materials are cheap, the process is forgiving, and the finish is where you decide the style.
The 32 paper mache bowl ideas below cover decorative dishes for coffee tables, entryways, shelves, and holidays. Some take an afternoon of painting. Others use cardboard armatures, decoupage, or sculpted rims. Each idea explains what makes it look the way it does, so you can recreate it with ordinary supplies.
One note first: these bowls are for decor. Paper mache isn’t food safe, so keep them for keys, trinkets, dried botanicals, and display.
Classic Matte White Newspaper Bowl
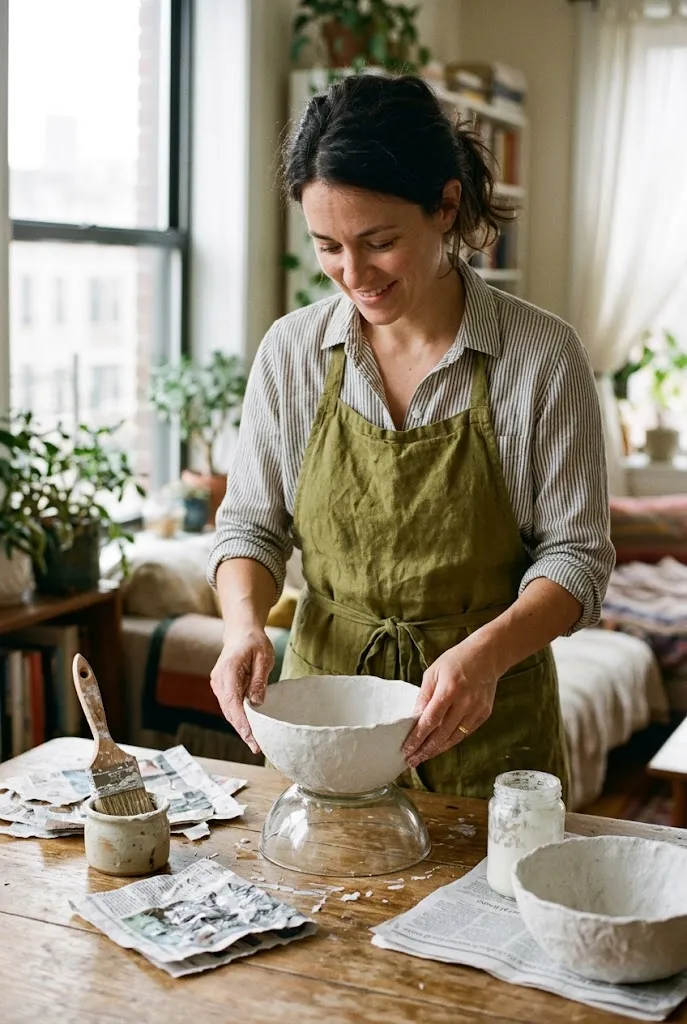
Start here if you’re new to the craft. Layer pasted newspaper strips over an upside-down kitchen bowl, let it dry fully, then paint the whole thing matte white. The plain finish shows off the bowl’s shape, and a slightly uneven rim looks handmade rather than flawed.
| Paste Option | Advantage | Best Fit |
|---|---|---|
| Flour and water | Very cheap, easy to mix | Casual projects, kids’ crafts |
| Diluted white PVA glue | Stronger and more moisture-resistant when dry | Bowls you want to last |
Quick Tip: Cover the mold with plastic wrap or a thin layer of petroleum jelly first so the dried shell slides off cleanly.
Terrazzo Confetti Bowl
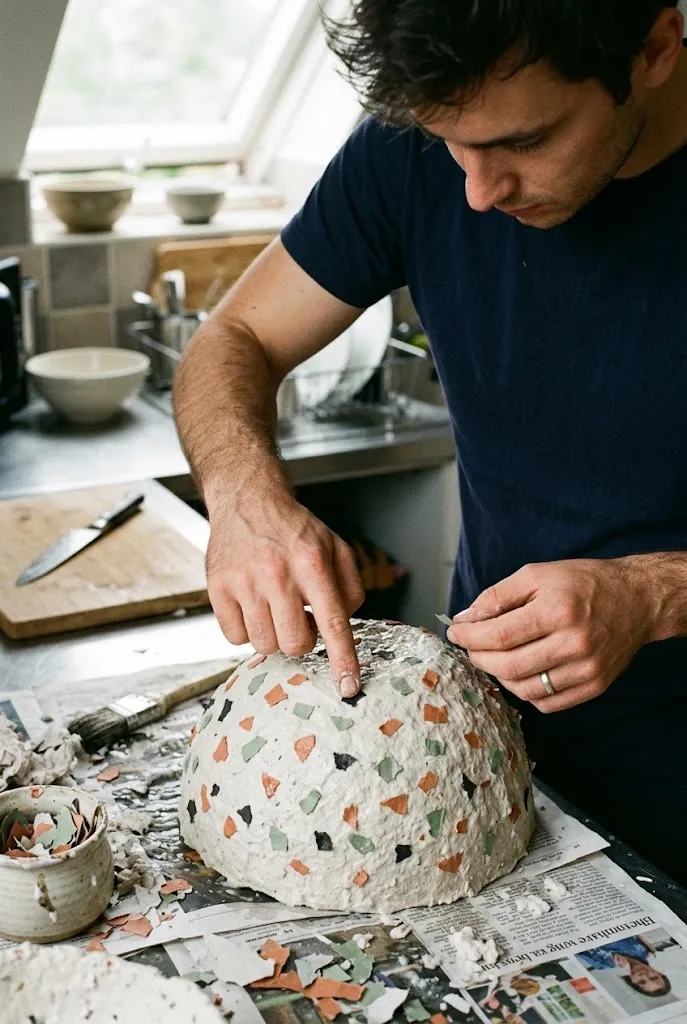
Terrazzo gets its look from small, irregular chips scattered across a pale base. To get it with paper, punch or tear colored paper into tiny flecks, press them into the final paste layer, and seal the surface smooth. Terracotta, sage, charcoal, and cream chips on an off-white base read as modern and calm.
- Cut chips in several sizes, not one uniform dot
- Keep the palette to four or five colors
- Sand lightly after drying so the chips sit flush
- Finish with a matte or satin sealer
Gold Leaf Rim Bowl

A single metallic edge makes a plain bowl look finished without covering the whole piece. Paint the bowl a deep color such as forest green or navy, then apply adhesive size and gold leaf or a quality metallic paint just along the lip. In practice, a thin, slightly irregular rim looks better than a perfectly crisp one.
Common Mistake: Gilding the entire inside and outside, which reads as costume jewelry.
Better Approach: Limit metallic to the rim or a thin interior band, and let the matte body do the rest.
Ombré Dip-Dyed Bowl

Ombré works because the color moves gradually. Paint the lower third in a saturated shade, blend upward with a damp sponge, and let the top fade to white or cream. Dusty blue to white, blush to cream, and olive to ivory all look soft and current.
Quick Facts
Best For: Bedroom dressers, bathroom shelves
Investment: Accessible
Visual Effect: Soft color gradient with a hand-blended finish
Scandinavian Stripe Bowl

Simple stripes in two or three muted colors suit this bowl. Use painter’s tape for crisp lines, or freehand them for a looser look. Black and cream is the safest pairing. Mustard, rust, and cream gives a warmer, mid-century feel.
Tape works best on a fully sealed base coat, since porous paper can let paint bleed under the edge.
Woven Strip Basket-Look Bowl

Instead of layering pasted sheets flat, you can weave long, thin strips of kraft paper over and under each other on a mold to build a basketry texture. The result looks like a woven bowl and is much lighter.
- Cut kraft or newspaper strips about three-quarters of an inch wide.
- Lay the spokes radiating from the center of the mold.
- Weave horizontal strips over and under, pasting as you go.
- Finish with a paste-soaked layer, then paint or stain.
Wavy Pinched Rim Bowl
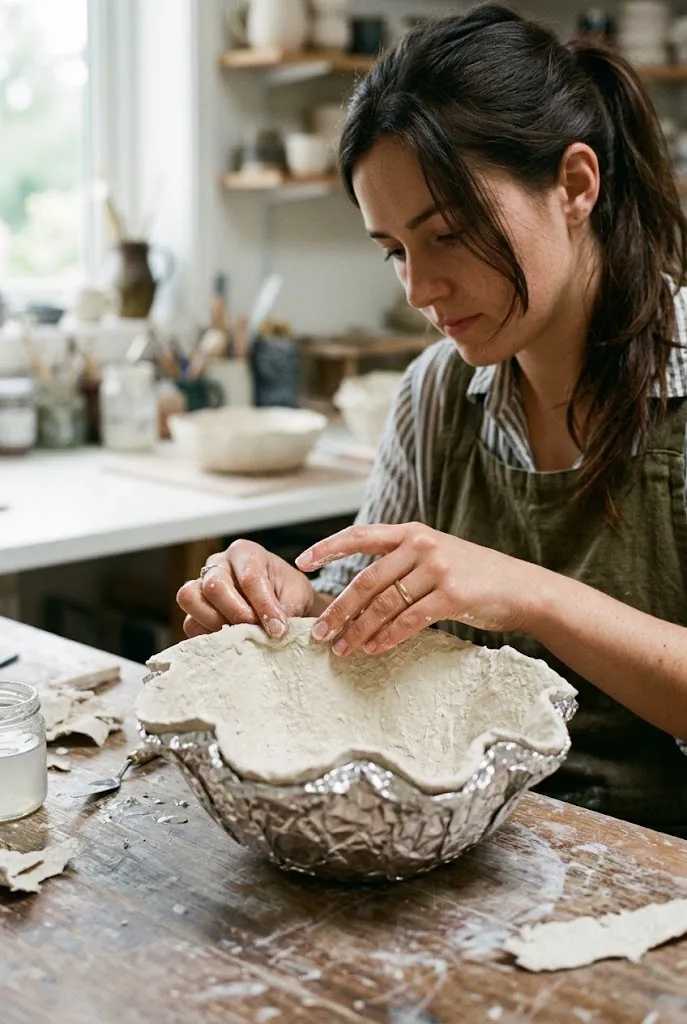
A wavy rim gives a bowl a soft, organic character. Before the paste dries, gently pinch and fold the rim into irregular curves, supporting it with crumpled foil so it holds shape. Asymmetry is the point here.
Editor’s Note: Wavy rims can feel unstable if the base is narrow. A flatter bottom makes the bowl sit securely on shelves.
Footed Pedestal Bowl

A foot makes a bowl look like a compote or fruit stand. Glue a short cardboard tube or a stack of cardboard rings beneath the base, then cover the join with extra paste layers so the bowl and foot read as one piece. Match the foot’s width to roughly a third of the bowl’s diameter for a stable, balanced look.
Lidded Trinket Bowl

Make two shells of nearly the same size and join them at the rim with a hinge or simply let the lid sit on top. Add a small knob made from a bead, a bottle cap covered with paper mache, or a rolled paper ball. Because the lid hides the contents, these suit jewelry, spare buttons, and small keepsakes.
Do: Test the lid fit before final painting.
Don’t: Paint the contact edge heavily, since thick paint can make it stick.
Hand-Painted Floral Bowl
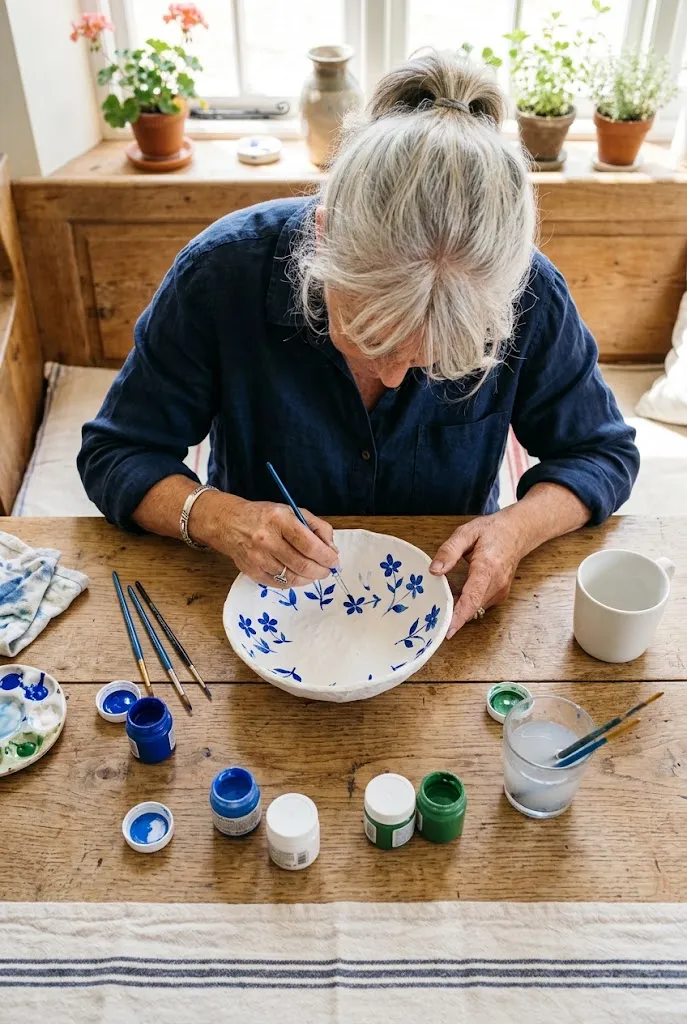
Paint on a solid base, then add simple flowers: five-petal blooms, leafy sprigs, and dots. A limited palette keeps it cohesive. Think cobalt on white, or terracotta and ochre on cream. Folk-style florals look best a bit loose, so don’t aim for botanical accuracy.
Speckled Faux Ceramic Bowl
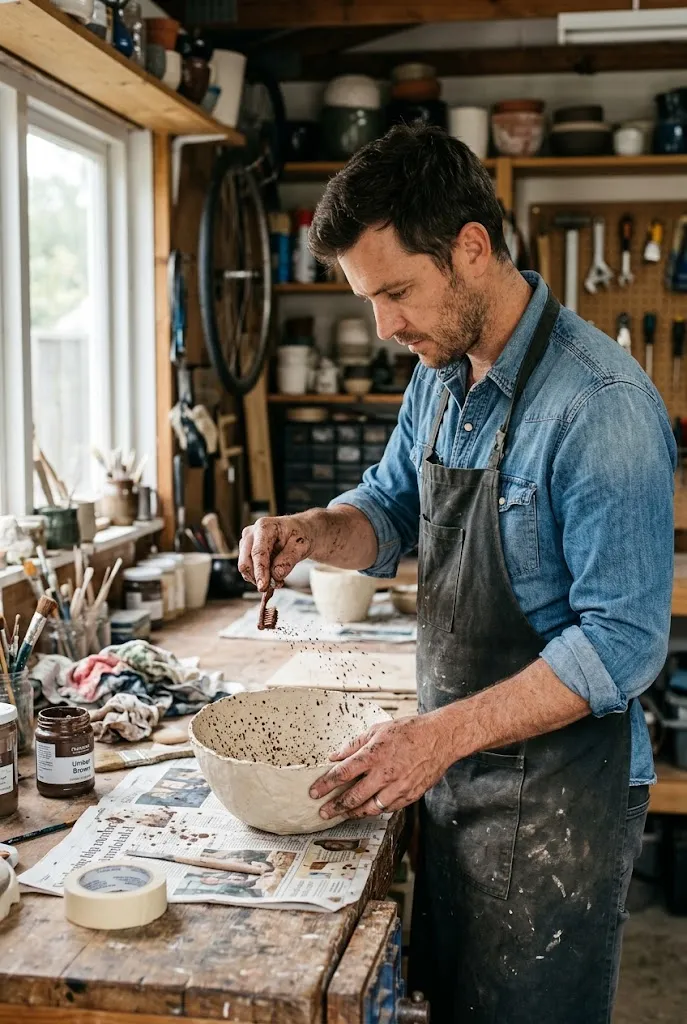
Speckling is what makes a paper bowl pass for stoneware. Paint a warm cream, then flick diluted brown or black paint from a stiff brush for random flecks. Finish with a satin water-based varnish for a glaze-like sheen.
| Finish | Effect | Best Fit |
|---|---|---|
| Matte sealer | Chalky, clay-like | Rustic and minimalist rooms |
| Satin varnish | Soft glaze look | Entryways, side tables |
| Gloss varnish | Reflective, shows brush marks | Bold color schemes |
Terracotta-Look Bowl

Mix a little fine sand or baking soda into matte terracotta paint for a gritty, fired-clay surface. Add subtle darker edges with a dry brush for age. The result suits plant corners, patios, and Southwestern-leaning rooms.
- Dry-brush darker shades near the rim
- Keep the interior a lighter, drier tone
- Seal with a matte sealer so the texture stays visible
Paper Tile Mosaic Bowl

Cut painted or printed paper into small tiles and glue them in tight rows over a base shell, leaving thin gaps like grout. Fill the gaps with thin paint or slightly thickened paste.
- Build and dry a smooth base bowl.
- Cut paper into half-inch squares.
- Glue from the center outward in curved rows.
- Seal with several thin coats of varnish.
Plan the color order before gluing. Blues and teals feel like sea glass, while mixed warm tones feel Moroccan.
Napkin Decoupage Bowl

Patterned paper napkins are a budget route to detailed prints. Separate the thin top ply, brush it onto the bowl with decoupage medium, and smooth outward from the center to avoid wrinkles. Botanical, citrus, and vintage patterns look especially good.
Quick Tip: Tear rather than cut the napkin edges. Torn edges blend more softly into the background.
Vintage Map Bowl

Old atlas pages or printed map sheets used as the top layer give a bowl travel-themed character without extra decoration. Sepia, faded blue, and cream tones sit well with wood shelves and brass accents. Use pages you own or reproductions with printing rights so that you aren’t copying anything protected.
Faceted Geometric Bowl
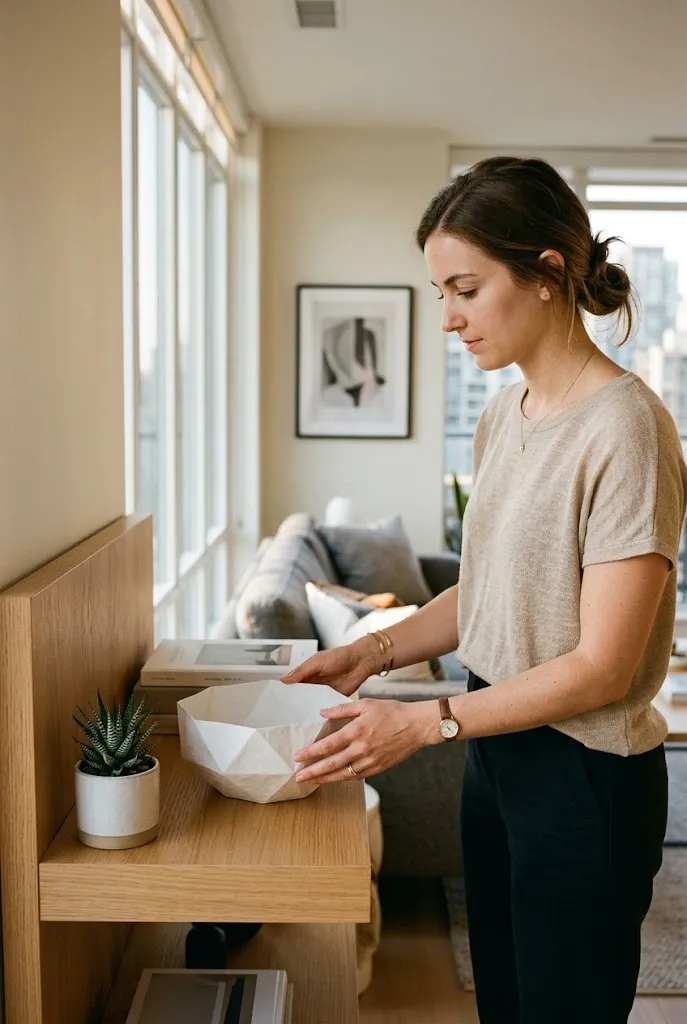
Instead of a round mold, build the shape from folded cardboard planes and tape, then cover with paste. The angular sides make a bowl look sculptural. Paint it in a single color so the facets show through light and shadow rather than pattern.
Editor’s Note: Sharp edges tend to rub through paint first, so reinforce the folds with an extra paste layer.
Leaf-Shaped Bowl

Press paste-soaked strips over a large real leaf, such as a hosta or rhubarb leaf, or over a leaf-shaped cardboard form. After drying, the veins remain subtly embossed. Paint it in olive, moss, or soft gold.
- Use a sturdy fresh leaf with prominent veins
- Place it vein-side up under the paper layers
- Remove the leaf once the paper is dry
Scallop Shell Bowl
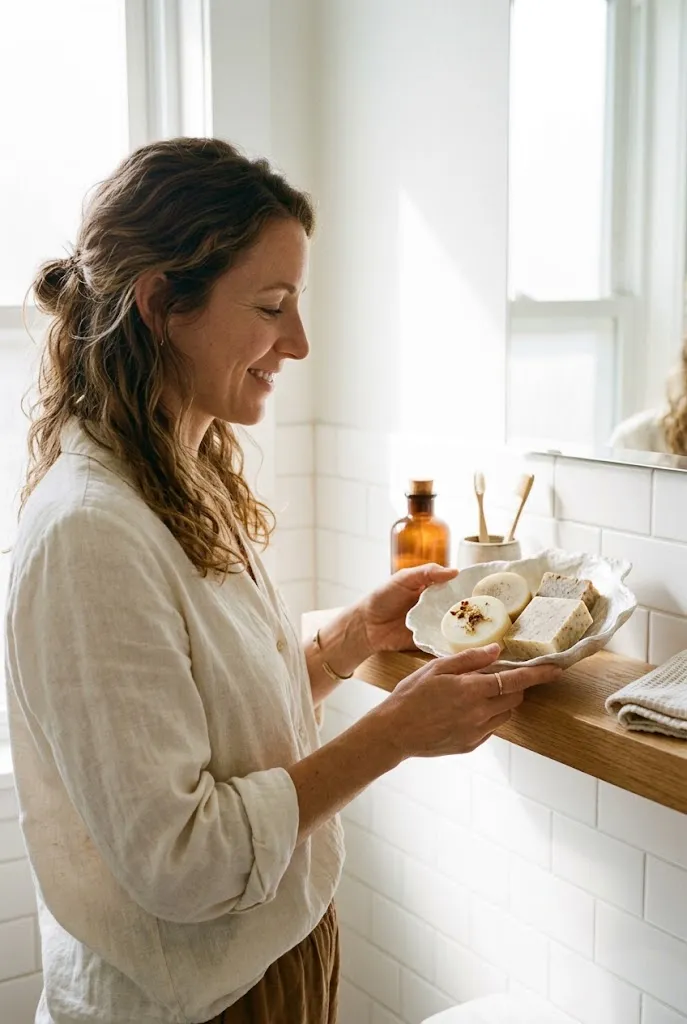
Radiating ridges give this bowl its coastal feel. Build the ribbed form from folded cardboard or corrugated strips, then cover with paste layers. Pearly white, pale pink, or sand paint with a slight sheen works well.
Best For: Bathrooms, beach-cottage shelves, vanity trays
Pumpkin-Shaped Fall Bowl

A rounded, ribbed shell with a stem makes a good autumn bowl. Form ridges with taped cardboard strips or string wrapped around the mold before pasting. Paint it a soft orange, sage, or cream, and let the stem be a rolled paper cone painted brown.
Common Mistake: Making ridges too deep, which tears the paper when you lift it off.
Better Approach: Keep the ribs shallow and rounded.
Nesting Trio

Make three bowls from graduated molds, such as a cereal bowl, a salad bowl, and a mixing bowl. Paint each in a closely related shade. Stacked together they look intentional, and apart they work as a small collection.
| Size | Typical Use |
|---|---|
| Small | Rings, keys, tealights |
| Medium | Dried flowers, remotes |
| Large | Decorative centerpiece |
Oversized Coffee Table Bowl
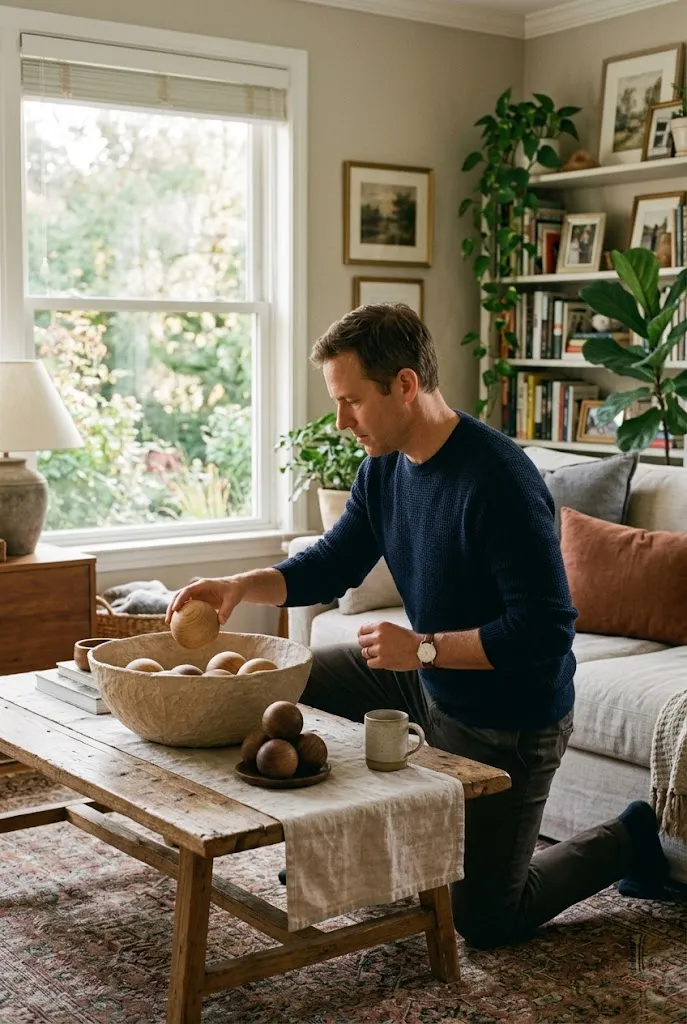
A big bowl makes a strong visual anchor. Use a large mixing bowl or a salvaged wide tray as the mold, and add an extra paste layer or a cardboard reinforcement ring for stability. Fill it with books, pinecones, or woven balls, and keep the surrounding table fairly clear.
Editor’s Note: Scale matters. A bowl at least a third of the table’s width looks deliberate.
Mini Ring Dish
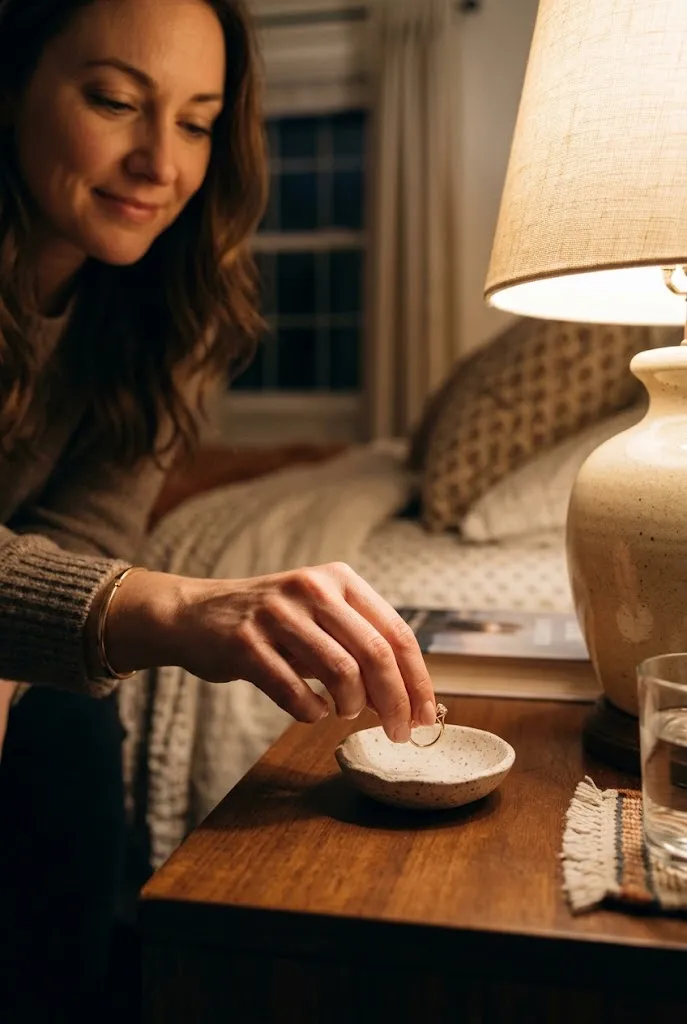
A small dish needs less paper and dries fast, which makes it a good first project. Mold it over a small egg cup, a jar lid, or a bottle cap. Use a few thin layers, then paint inside with a bright color or metallic.
Quick Facts
Best For: Rings, earrings, bedside use
Investment: Accessible
Visual Effect: Delicate, collectible
Tealight Cutout Bowl

Cut shapes such as stars, circles, or leaves into the sides of a dry shell with a craft knife, then seal the edges. Place a battery-operated tealight inside for a soft pattern of light. Use LED candles only, since paper and open flame shouldn’t mix.
- Draw the pattern lightly in pencil.
- Cut with a sharp craft knife on a mat.
- Sand the edges smooth.
- Seal and paint.
Hanging Macramé Bowl

Make a shallow, light bowl and suspend it with cotton cord through evenly spaced holes near the rim. Reinforce each hole with extra paper or a small grommet. It works for lightweight items such as air plants or decorative moss.
Do: Keep the load very light.
Don’t: Hang it with anything heavy or wet.
Succulent Cover Bowl

A paper mache bowl can hide a plain plastic nursery pot as a decorative cachepot. Use the pot itself as the mold’s inner guide, and make sure the cover bowl never holds water. Paper and prolonged moisture do not mix, so the plant should stay in its own pot with a saucer.
Common Mistake: Planting directly into the bowl.
Better Approach: Treat the bowl as a sleeve and water the plant separately.
Entryway Key Bowl
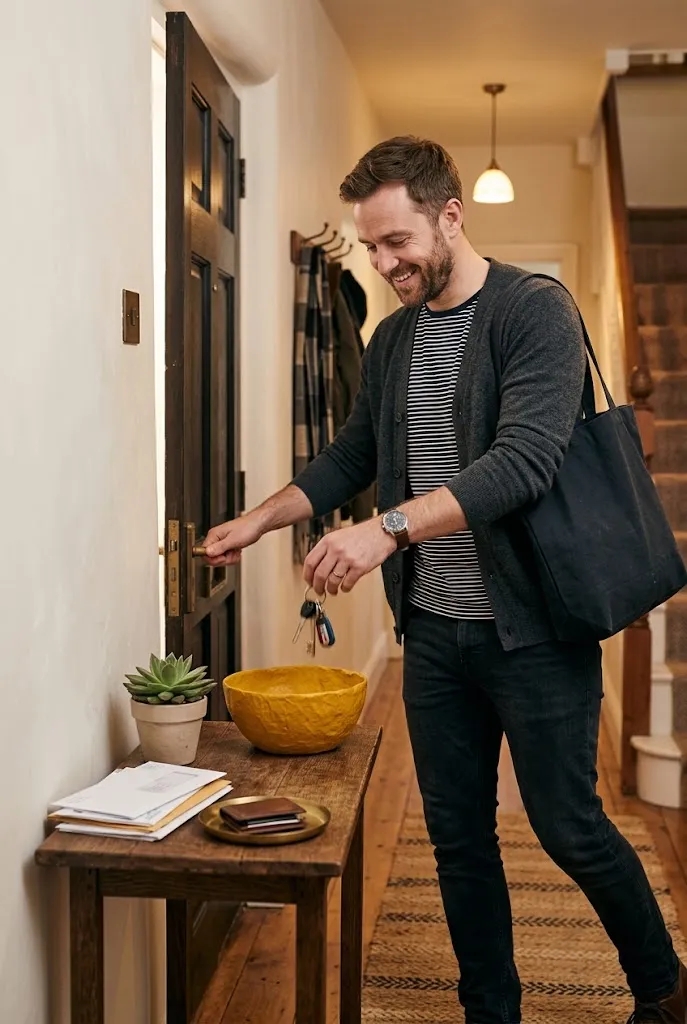
A key bowl should be sturdy and shallow enough to see what’s inside. Use thicker layers, around five or six, and a heavier base for stability. Paint it in a bold color to stand out against a neutral entry.
- Choose a flat base
- Add felt to the bottom to protect furniture
- Seal inside and out for daily handling
Winter White Glitter Holiday Bowl

For winter, paint a bowl white and brush on a thin layer of clear adhesive, then sprinkle fine, nonmetallic or biodegradable glitter on the rim only. Fill it with ornaments or pine cuttings.
Editor’s Note: Seal glitter well so it doesn’t shed onto furniture.
Pastel Spring Egg Bowl

For Easter, paint a bowl in pale mint, lavender, or butter yellow, and use it to display decorated eggs. A scalloped or lightly ruffled rim feels spring-like. It makes a decor piece rather than a serving dish.
Balloon-Mold Kids Bowl

This is a good way to get children started. Blow up a balloon, pasting strips over half of it, and let it dry completely. Pop the balloon once the shell is rigid, then trim the rim.
- Inflate a balloon and rest it in a cup.
- Paste on four or five layers.
- Dry fully, usually a day or more.
- Pop, trim, and decorate with bright paint.
An adult should handle the craft knife for trimming.
Pressed Botanical Bowl
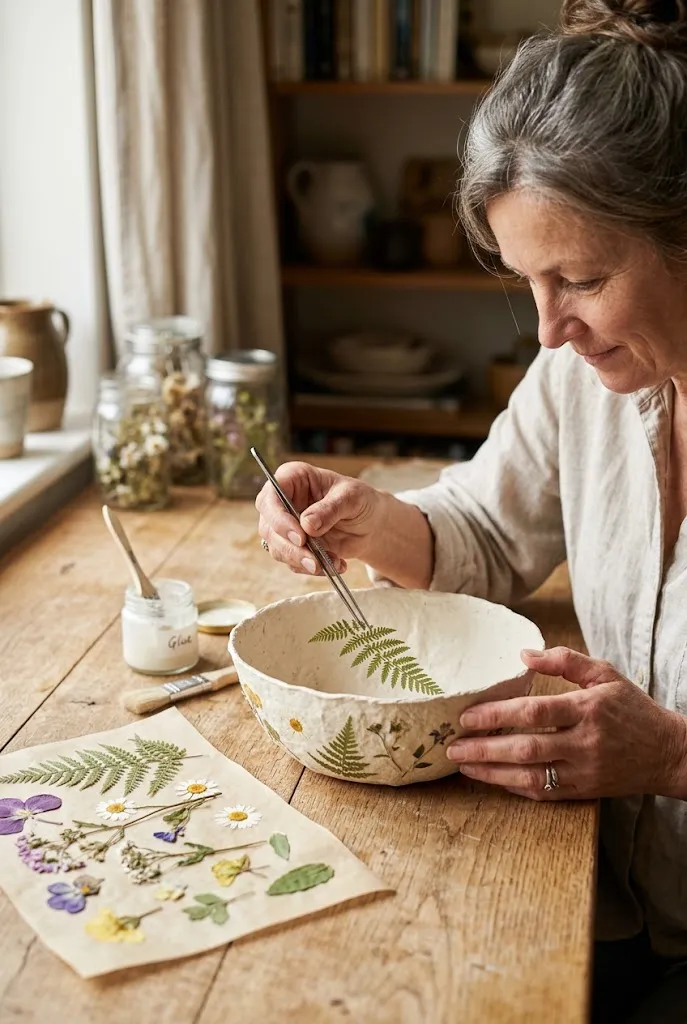
Press ferns, small flowers, and leaves between book pages for a few days, then lay them on the bowl and glue with a thin layer of decoupage medium. Seal over them lightly so the delicate shapes stay visible.
Quick Tip: Choose thin, flat botanicals. Thick petals can bubble or turn brown beneath the sealer.
Marbled Black-and-Gold Bowl
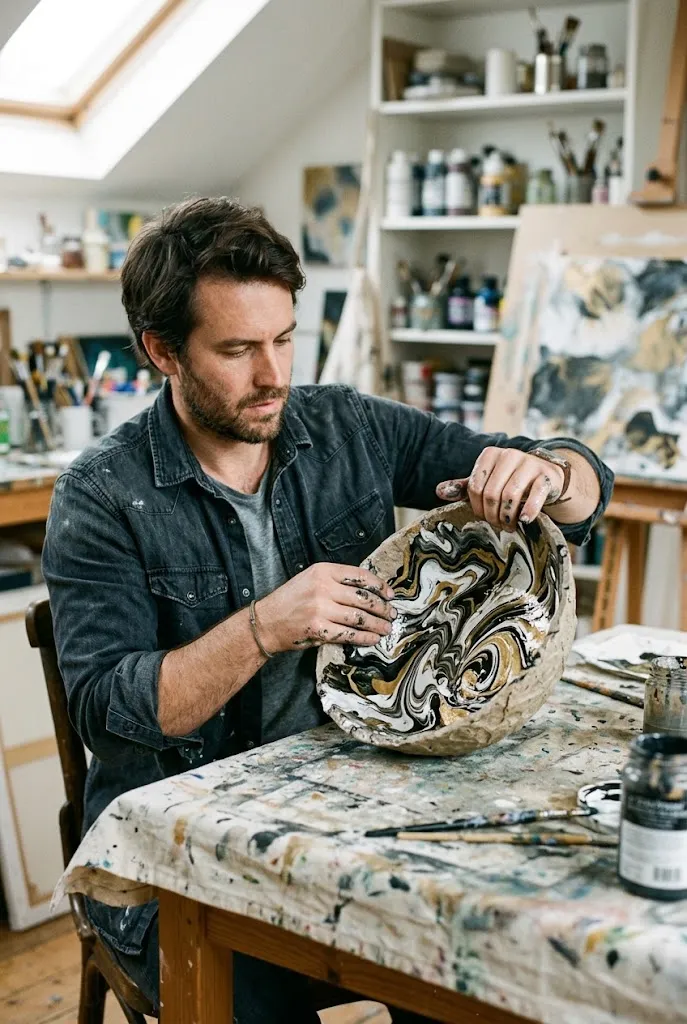
Marbling gives a high-impact look. Swirl black, white, and gold acrylic together on the bowl, tilting it so the colors flow into veins. Seal with a satin varnish. This is a bolder, more dramatic choice than the soft neutral bowls earlier in the list.
Do: Work on a covered surface and thin the paint slightly.
Don’t: Over-blend, since the veins will turn muddy.
Jute-Rope Wrapped Bowl
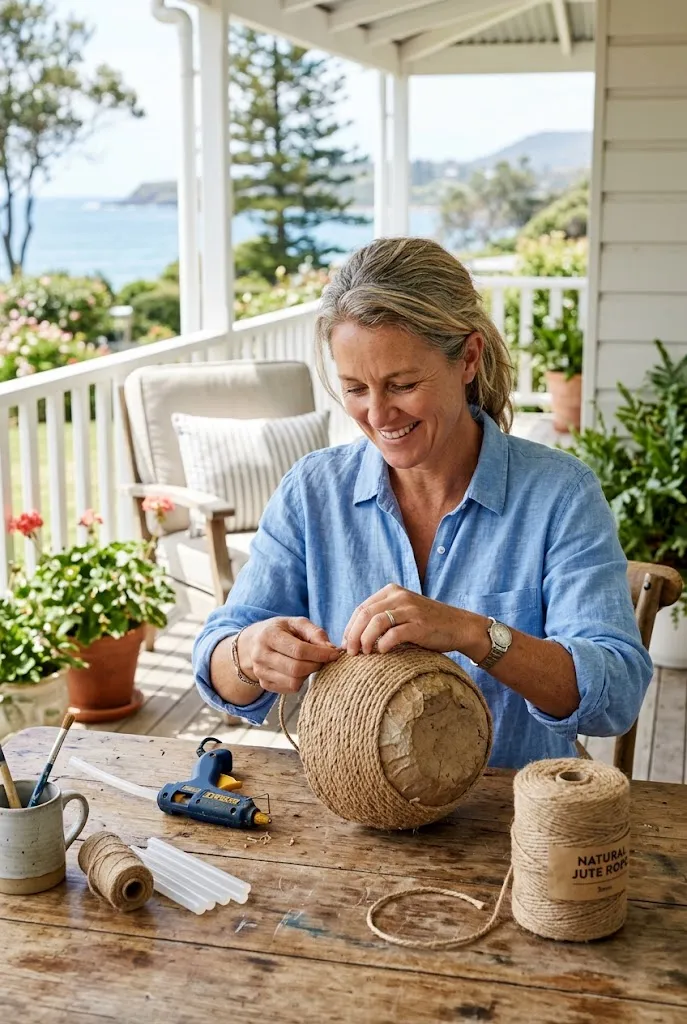
Coil natural jute rope around the outside of a dry shell and glue it as you go, working from the base upward. The rope adds texture and gives the bowl a casual, coastal character. Leave the interior smooth and painted a solid, light color.
Best For: Entryways, beach-style rooms, plant corners
Paper Mache Bowl Basics and Safety
A few habits make nearly every idea above work better:
- Dry fully between stages. Damp paper can mold or soften under paint. Layers often need a day or more to dry, depending on thickness and humidity.
- Don’t speed-dry with high heat. An oven or a hot hair dryer can warp the shell.
- Seal everything. Water-based acrylic sealer or varnish adds protection.
- Keep it decorative. Paper mache bowls aren’t food safe or waterproof.
- Use LED lights only if lighting is part of the design.
Paper Mache Bowl FAQs
How many layers does a sturdy paper mache bowl need?
Many crafters use around four to six layers for a bowl that holds its shape, with thinner decorative dishes needing fewer. Add more for large or heavily handled pieces.
Can I use a paper mache bowl for food?
No. They aren’t food safe or washable, so use them for dry decor items only.
How do I keep a paper mache bowl from sticking to the mold?
Line the mold with plastic wrap or a thin layer of petroleum jelly before pasting.
How long does a paper mache bowl take to dry?
It depends on layer count and humidity, but plan on a day or more for a full shell before painting.
Pick a Starting Point
If this is your first bowl, begin with the classic matte white version or a small ring dish, since both teach the paste-and-dry rhythm quickly. Once that feels comfortable, try a decorative finish like speckling, decoupage, or marbling, then move to sculpted shapes such as scallops or faceted forms. Keep each bowl simple enough to finish, and the collection will build naturally.